Thank you for buying our urine separator!
Welcome to our guide on how to install your new urine separator in your composting toilet. Whether you're fitting out a cozy cabin, a mobile van, a house boat, a rustic outhouse, or your fruitful allotment, this guide will help you ensure your urine separating composting toilet is set up correctly.
Get ready to experience the benefits of urine separating toilets: reduced odours, resource recovery, and a lighter environmental footprint. Let's get started!
DIY Compost Toilet
Building a compost toilet can be daunting at first but we're here to help and to share our experiences of different set-ups.
There are many different ways that people have made toilets all over the world, as varied and creative as the people on this planet.
Depending on your design, you will either be building a portable composting toilet box, or you will be building a shed to go around your box.
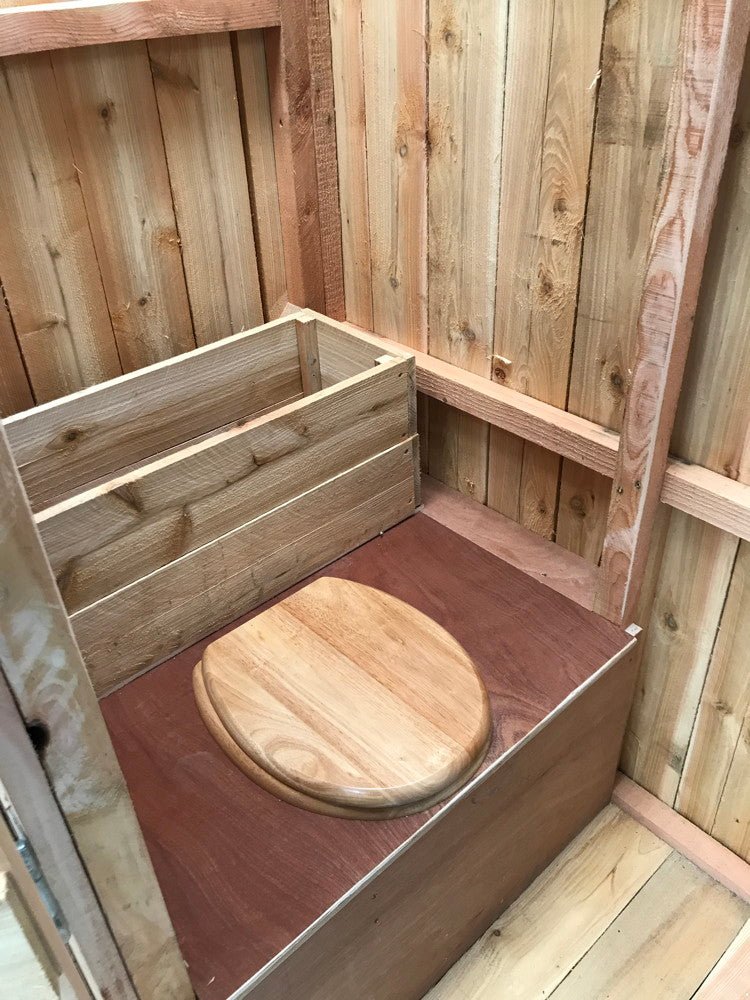
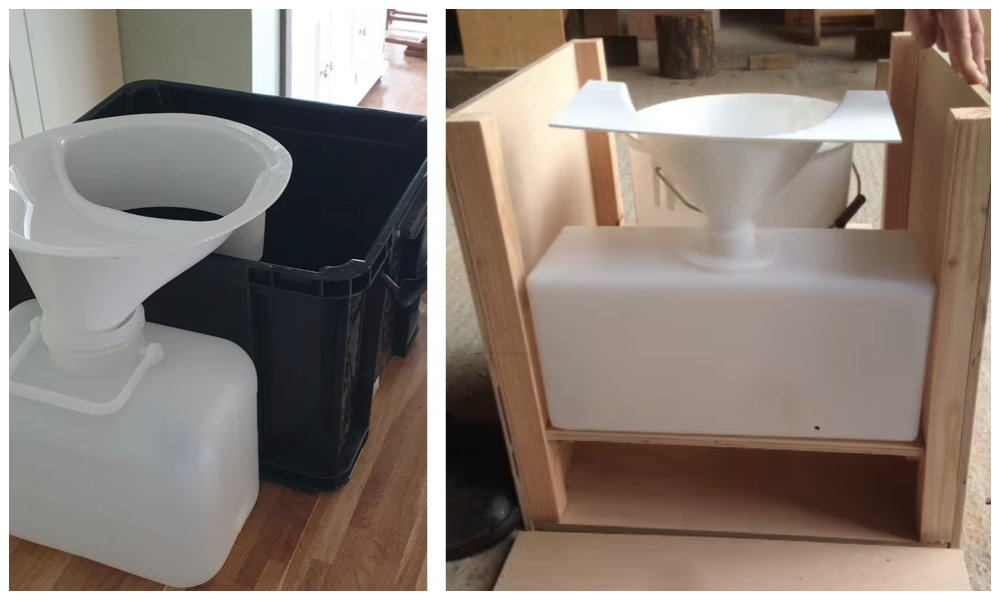
Before we build any toilets at Free Range Designs, we first lay out the urine separator, poo container and wee container; these components inform the design to follow and determine all the other dimensions.
The common feature of all our toilets is urine separation, which is the key factor for successful odour-free composting. For collecting the solids, our designs include a range of solutions, from the basic bucket to the common wheelie bin, and recycled plastic twin chambers.
Installing and Positioning the Urine Separator
Urine Separation Pipe Installation
Once you have choosen your toilet design then the next step is choosing your plumbing.
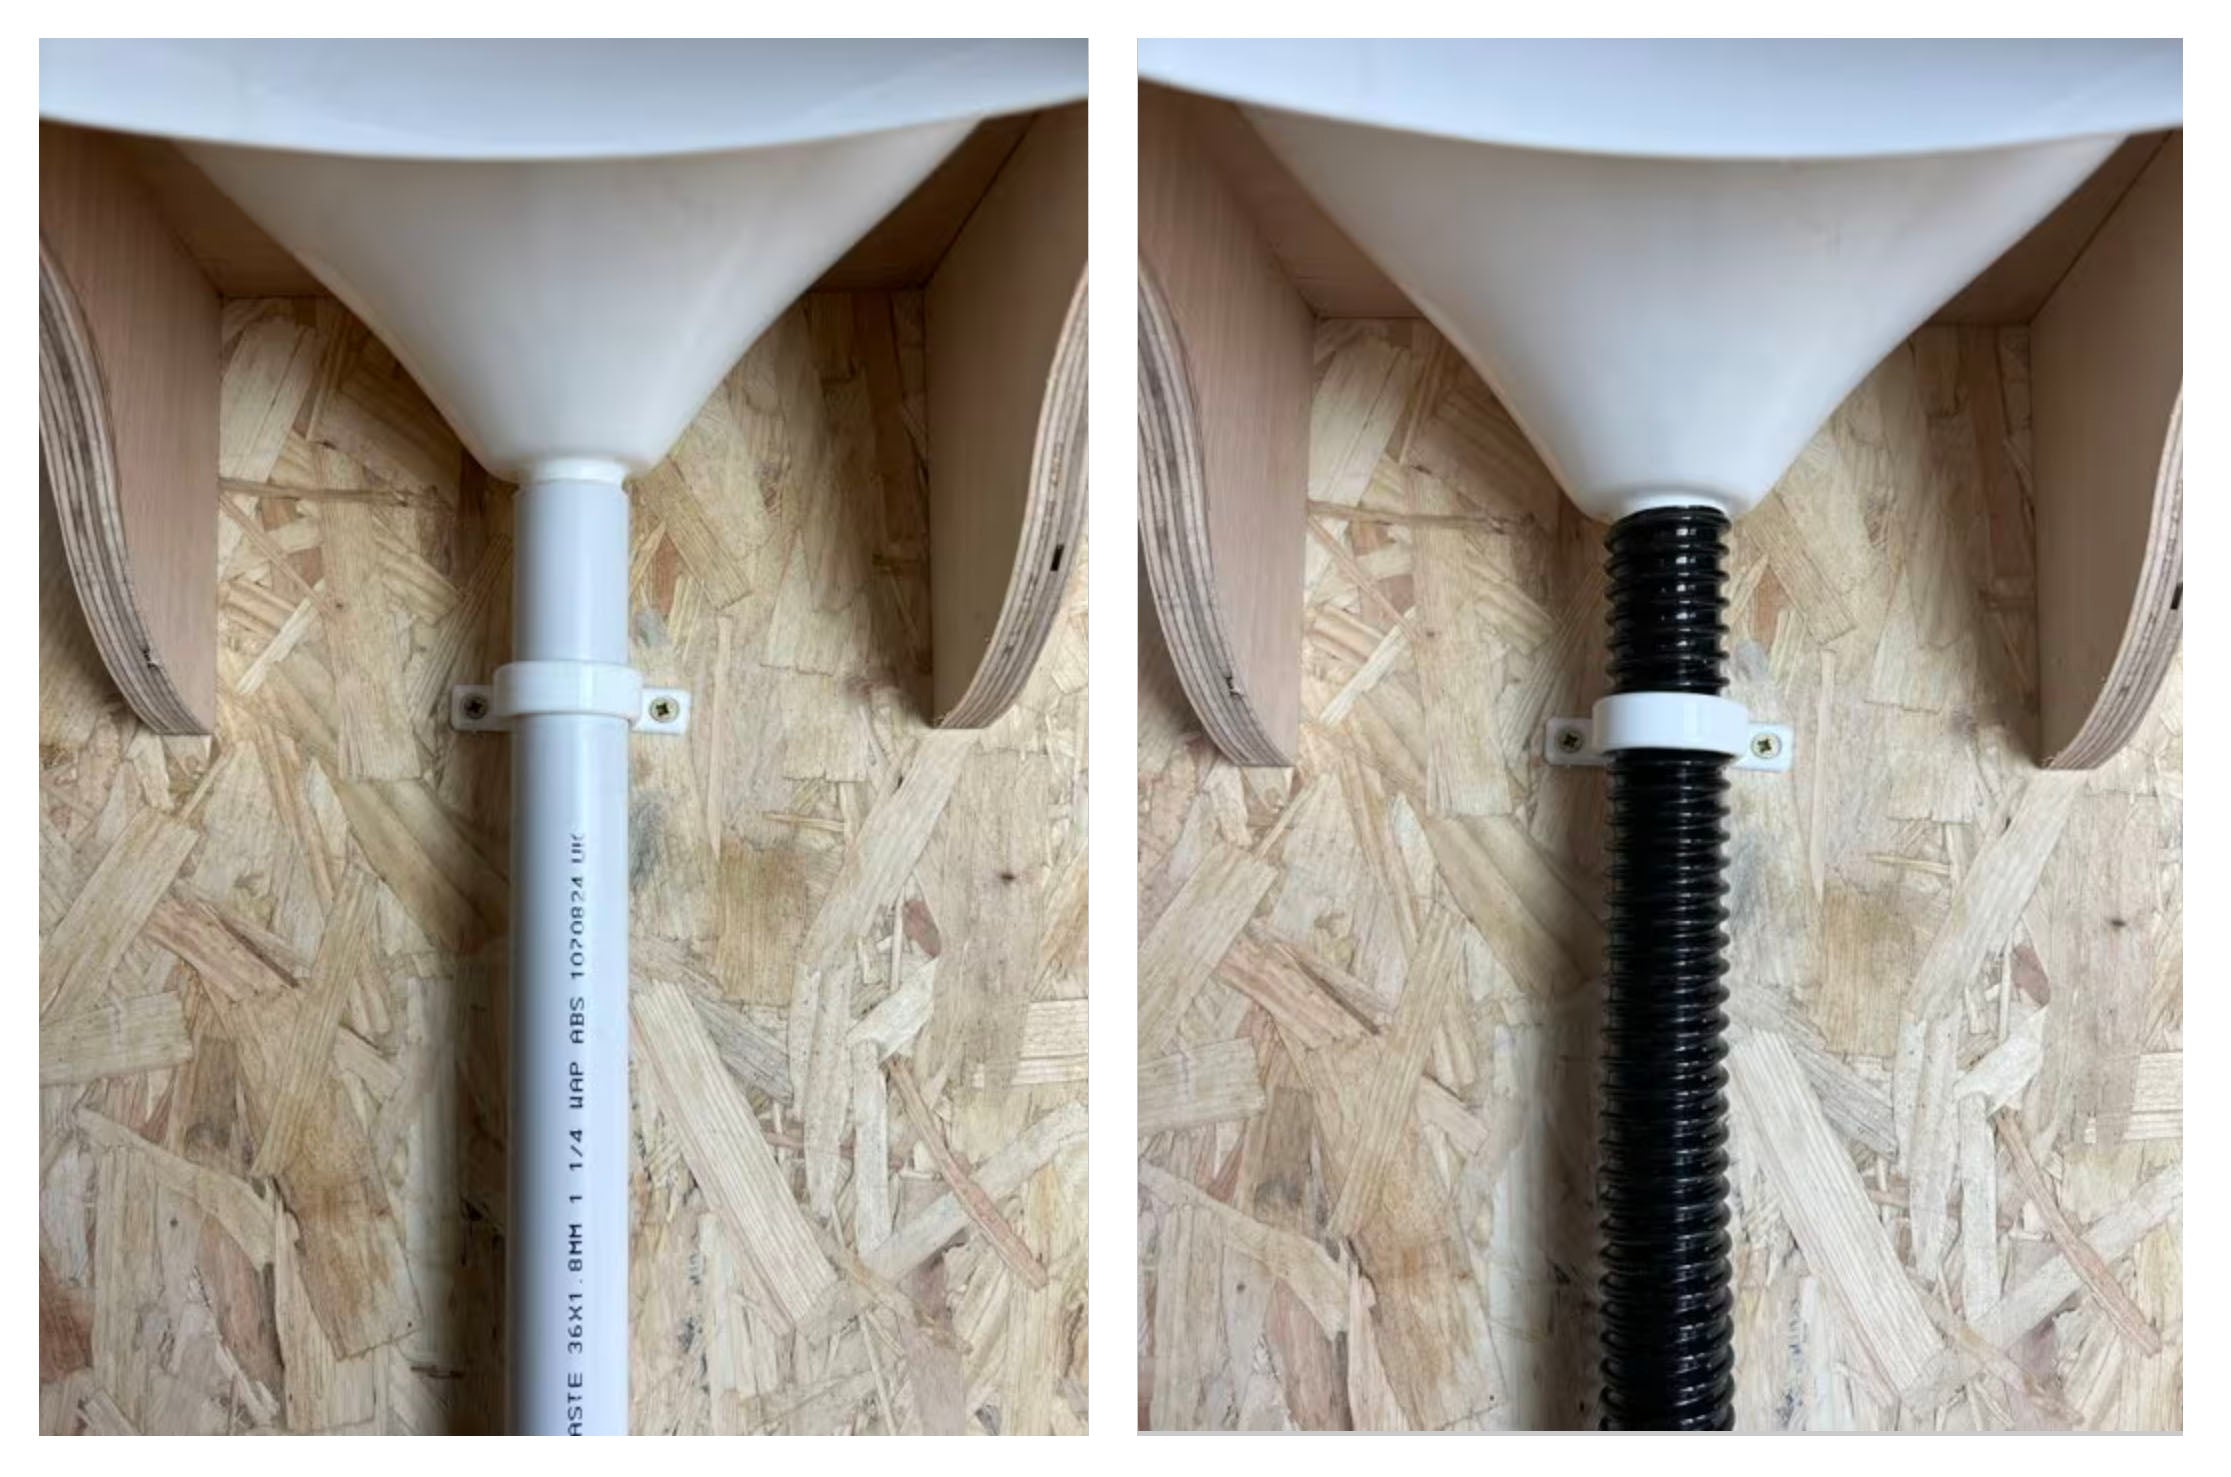
We have designed the urine separator to be used with 1 1/4" push fit, 1 1/4"solvent weld and 32mm flexible pipe. The advantages of solvent is its strength but this does mean that once it is glued it cannot easily be changed. Push fit is easier to modify if you want to change your design later on. While fluxible pipe is easy to route but the interal ribs sometime do get clogged up with sawdust.
When choosing and finding your pipe to fit the most important part is the internal dimension of the pipe. The nozzel of the separator tapers from 30mm to 35mm. This tolerance allows multiple pipes to fit on this.
If you do choose 1 1/4" push fit then the fitting is tight and you need to shape the internal pipe using a deburring tool or some sandpaper.
02
Fitting Your Separator
Positioning the Urine Separator on the Toilet
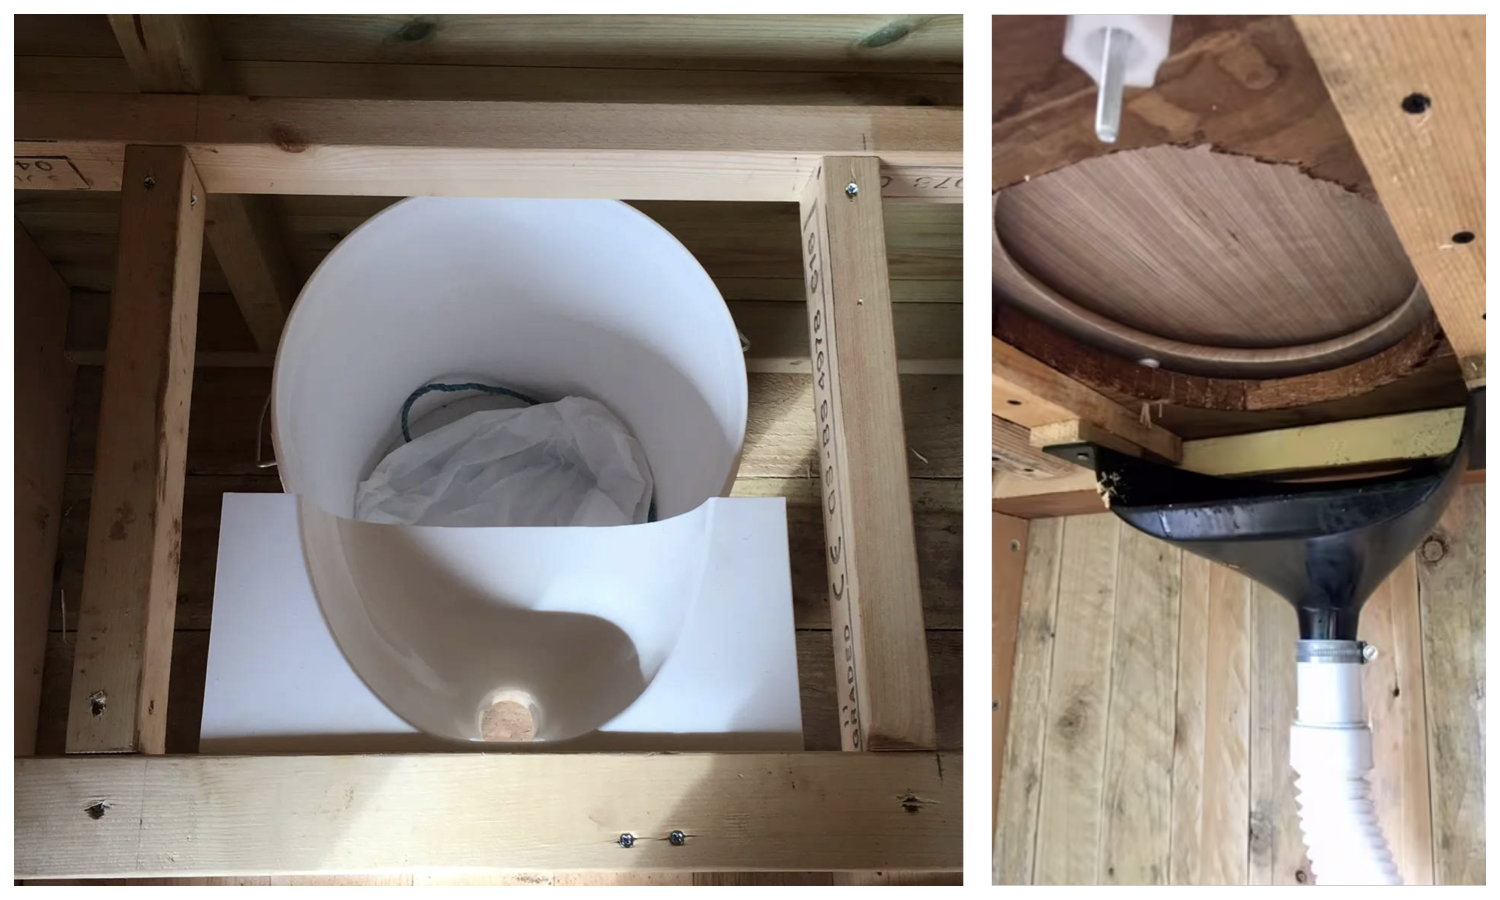
To hold the separator in place you can either attach it to the base of the toilet seat with screws or you can create a bracket to hold the separator onto the front face of the box.
The plastic separator can then be drilled and screwed onto the bracket. Doing it this way alows the separator to be positioned lower down if need be.
Pilot holes the sides of the urine separator before screwing to place.
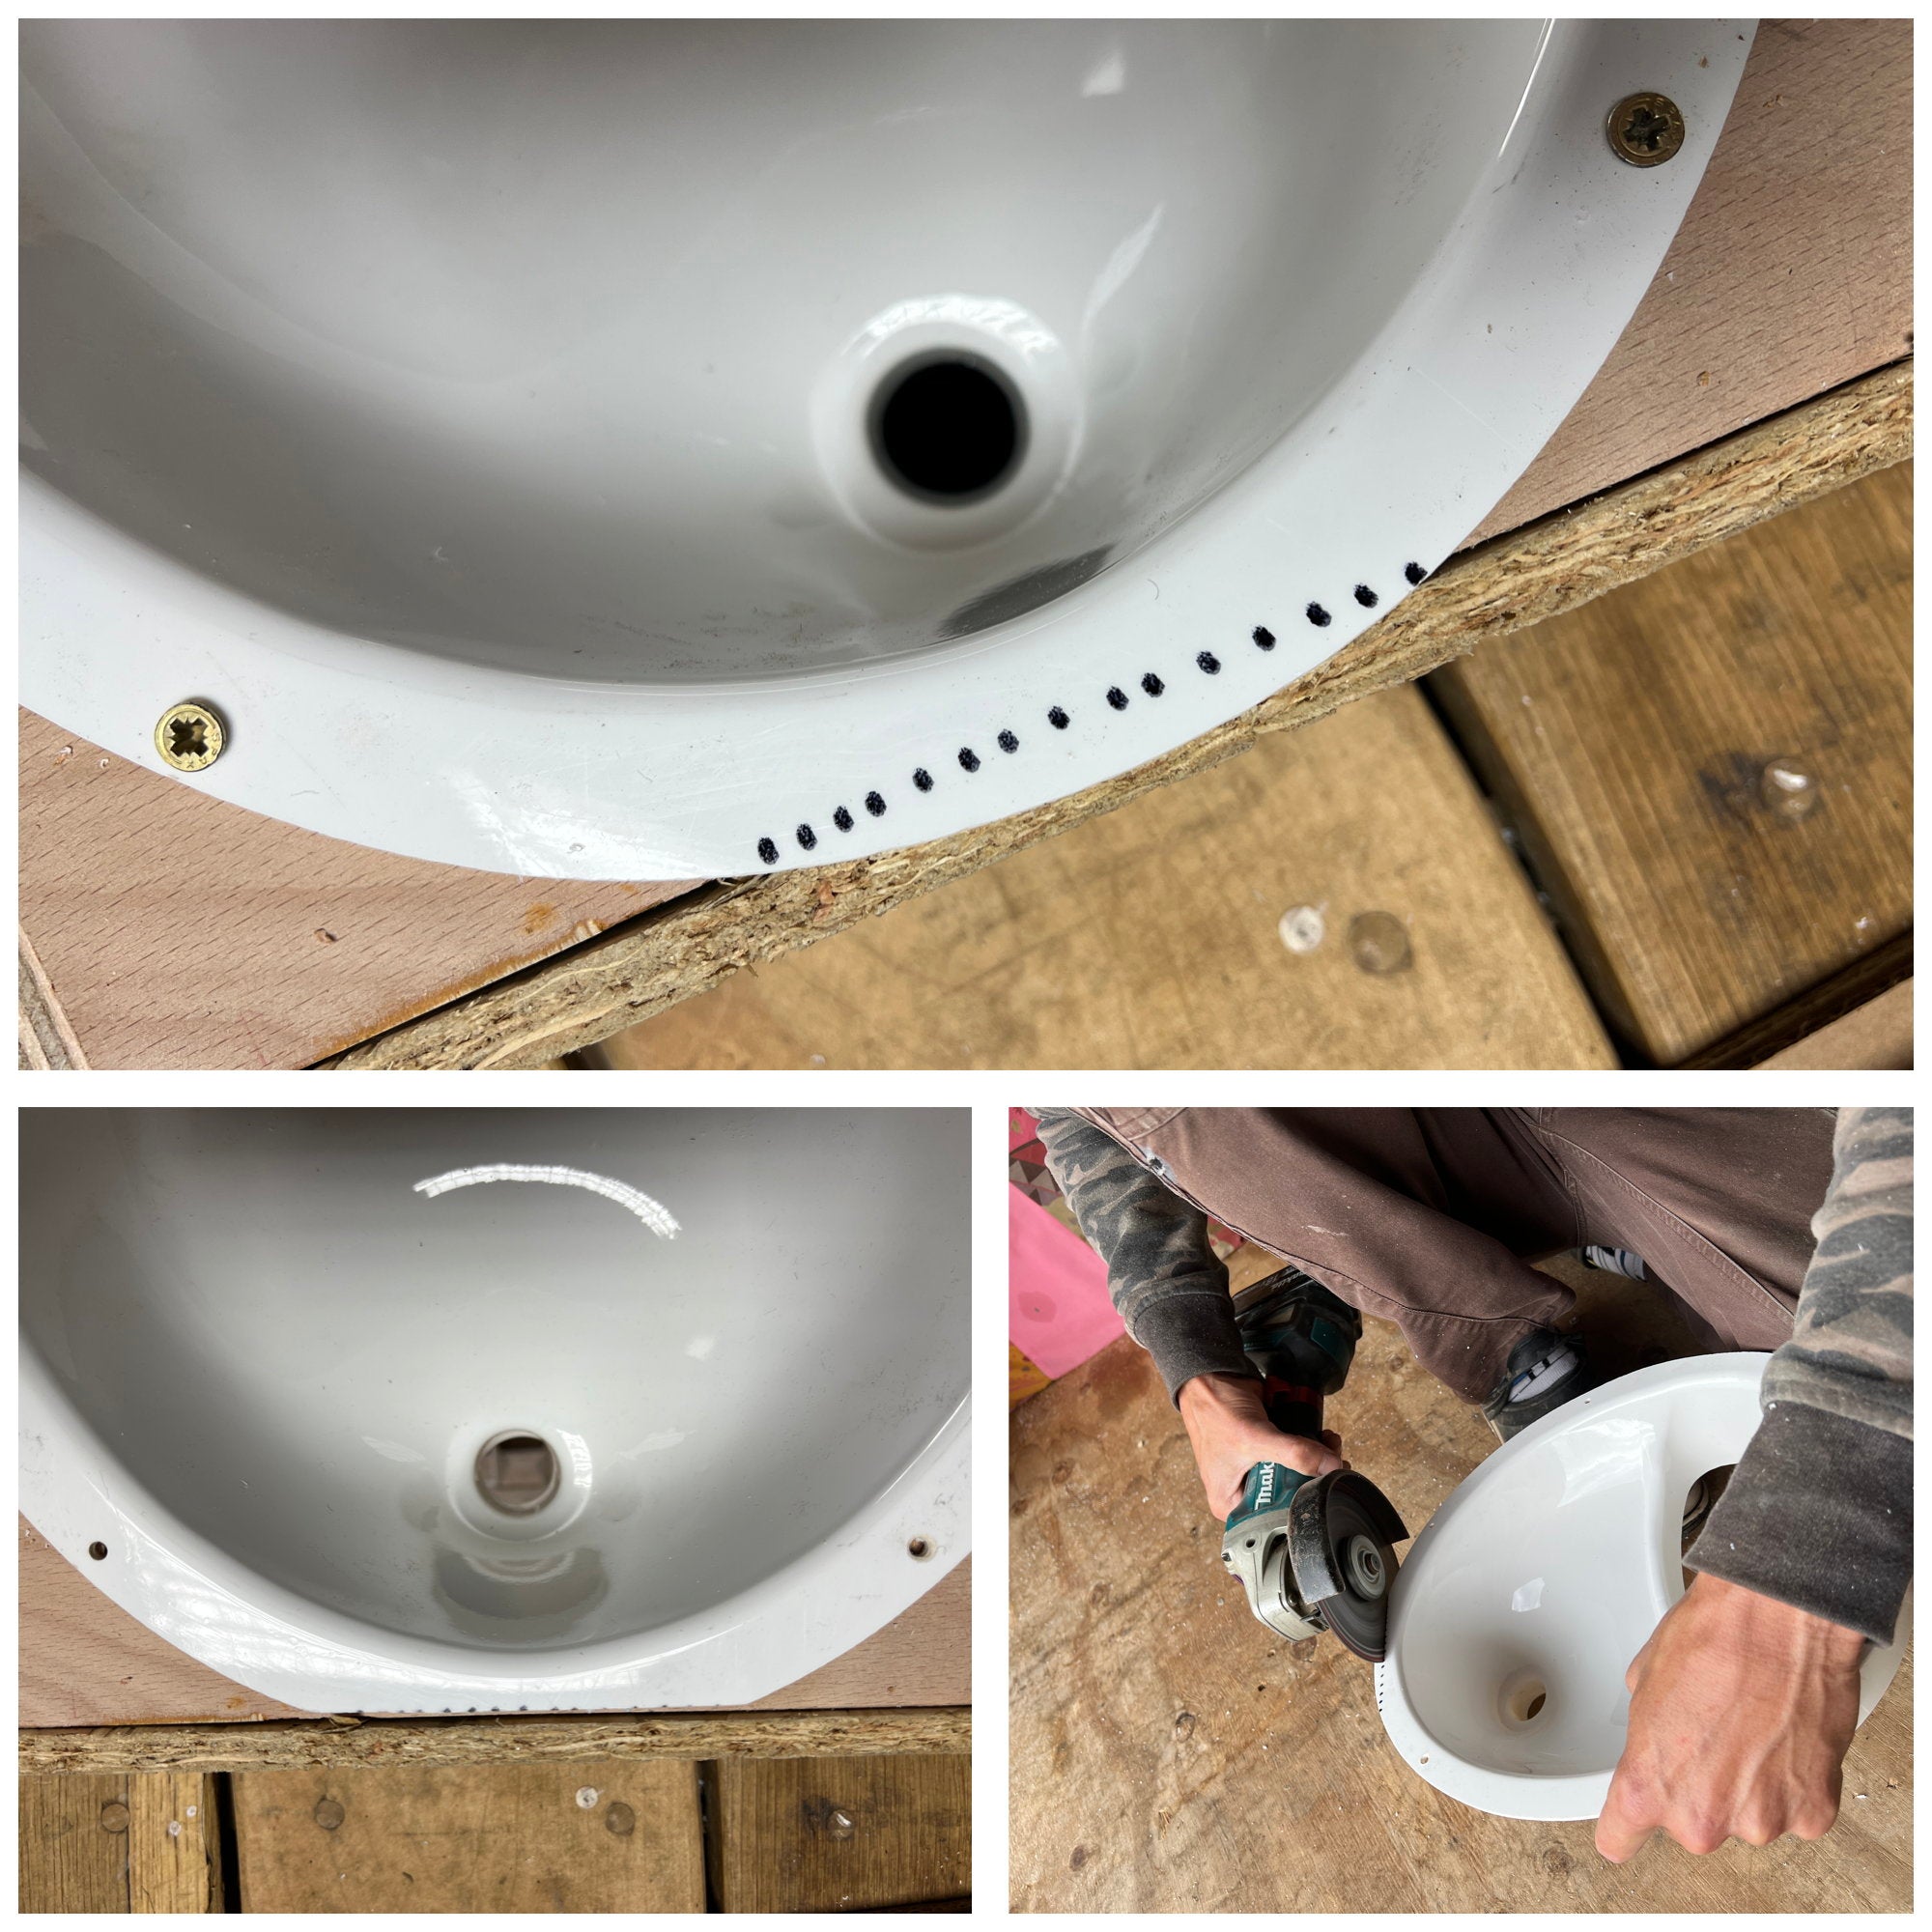
Cutting the Urine Separator to fit.
Having the urine pipe come as close to the front of the toilet, means the bucket is closer to the middle and the middle of the drop zone is then closer to the front. This is very important as you do not want people having to reach to far back or pooing into the funnel.
I like the pipe work to run as close the front as possible and therefore I will cut down the front of the separator to allow as close a gap between the pipe and the back on the wall as possible complete I cut the font of the curve off to allow it to fit.
To cut the plastic I use a angle grinder with a metal cutting disc but equally a handsaw would do the job.
Choosing the right height for the Urine Separator
An important consideration to make is how high up do you position the separator. Too high and mens dangling bits can touch the plastic funnel. Too low and you have wasted space which when you are trying to be as verically compact as possible is a disadvantage. Remember to keep in mind the height of your toilet seat and your timber that this sits on. We have designed the separtor to be as shallow as possible to accomadate all toilets, but you might want to consider dropping the separator to fit. Using a standard toilet seat 5cm and a 2cm ply toilet top then we think the urine separtor can be positioned 0-2cm below the bottom the the toilet top. It's one of those things that you have to play around with yourself.
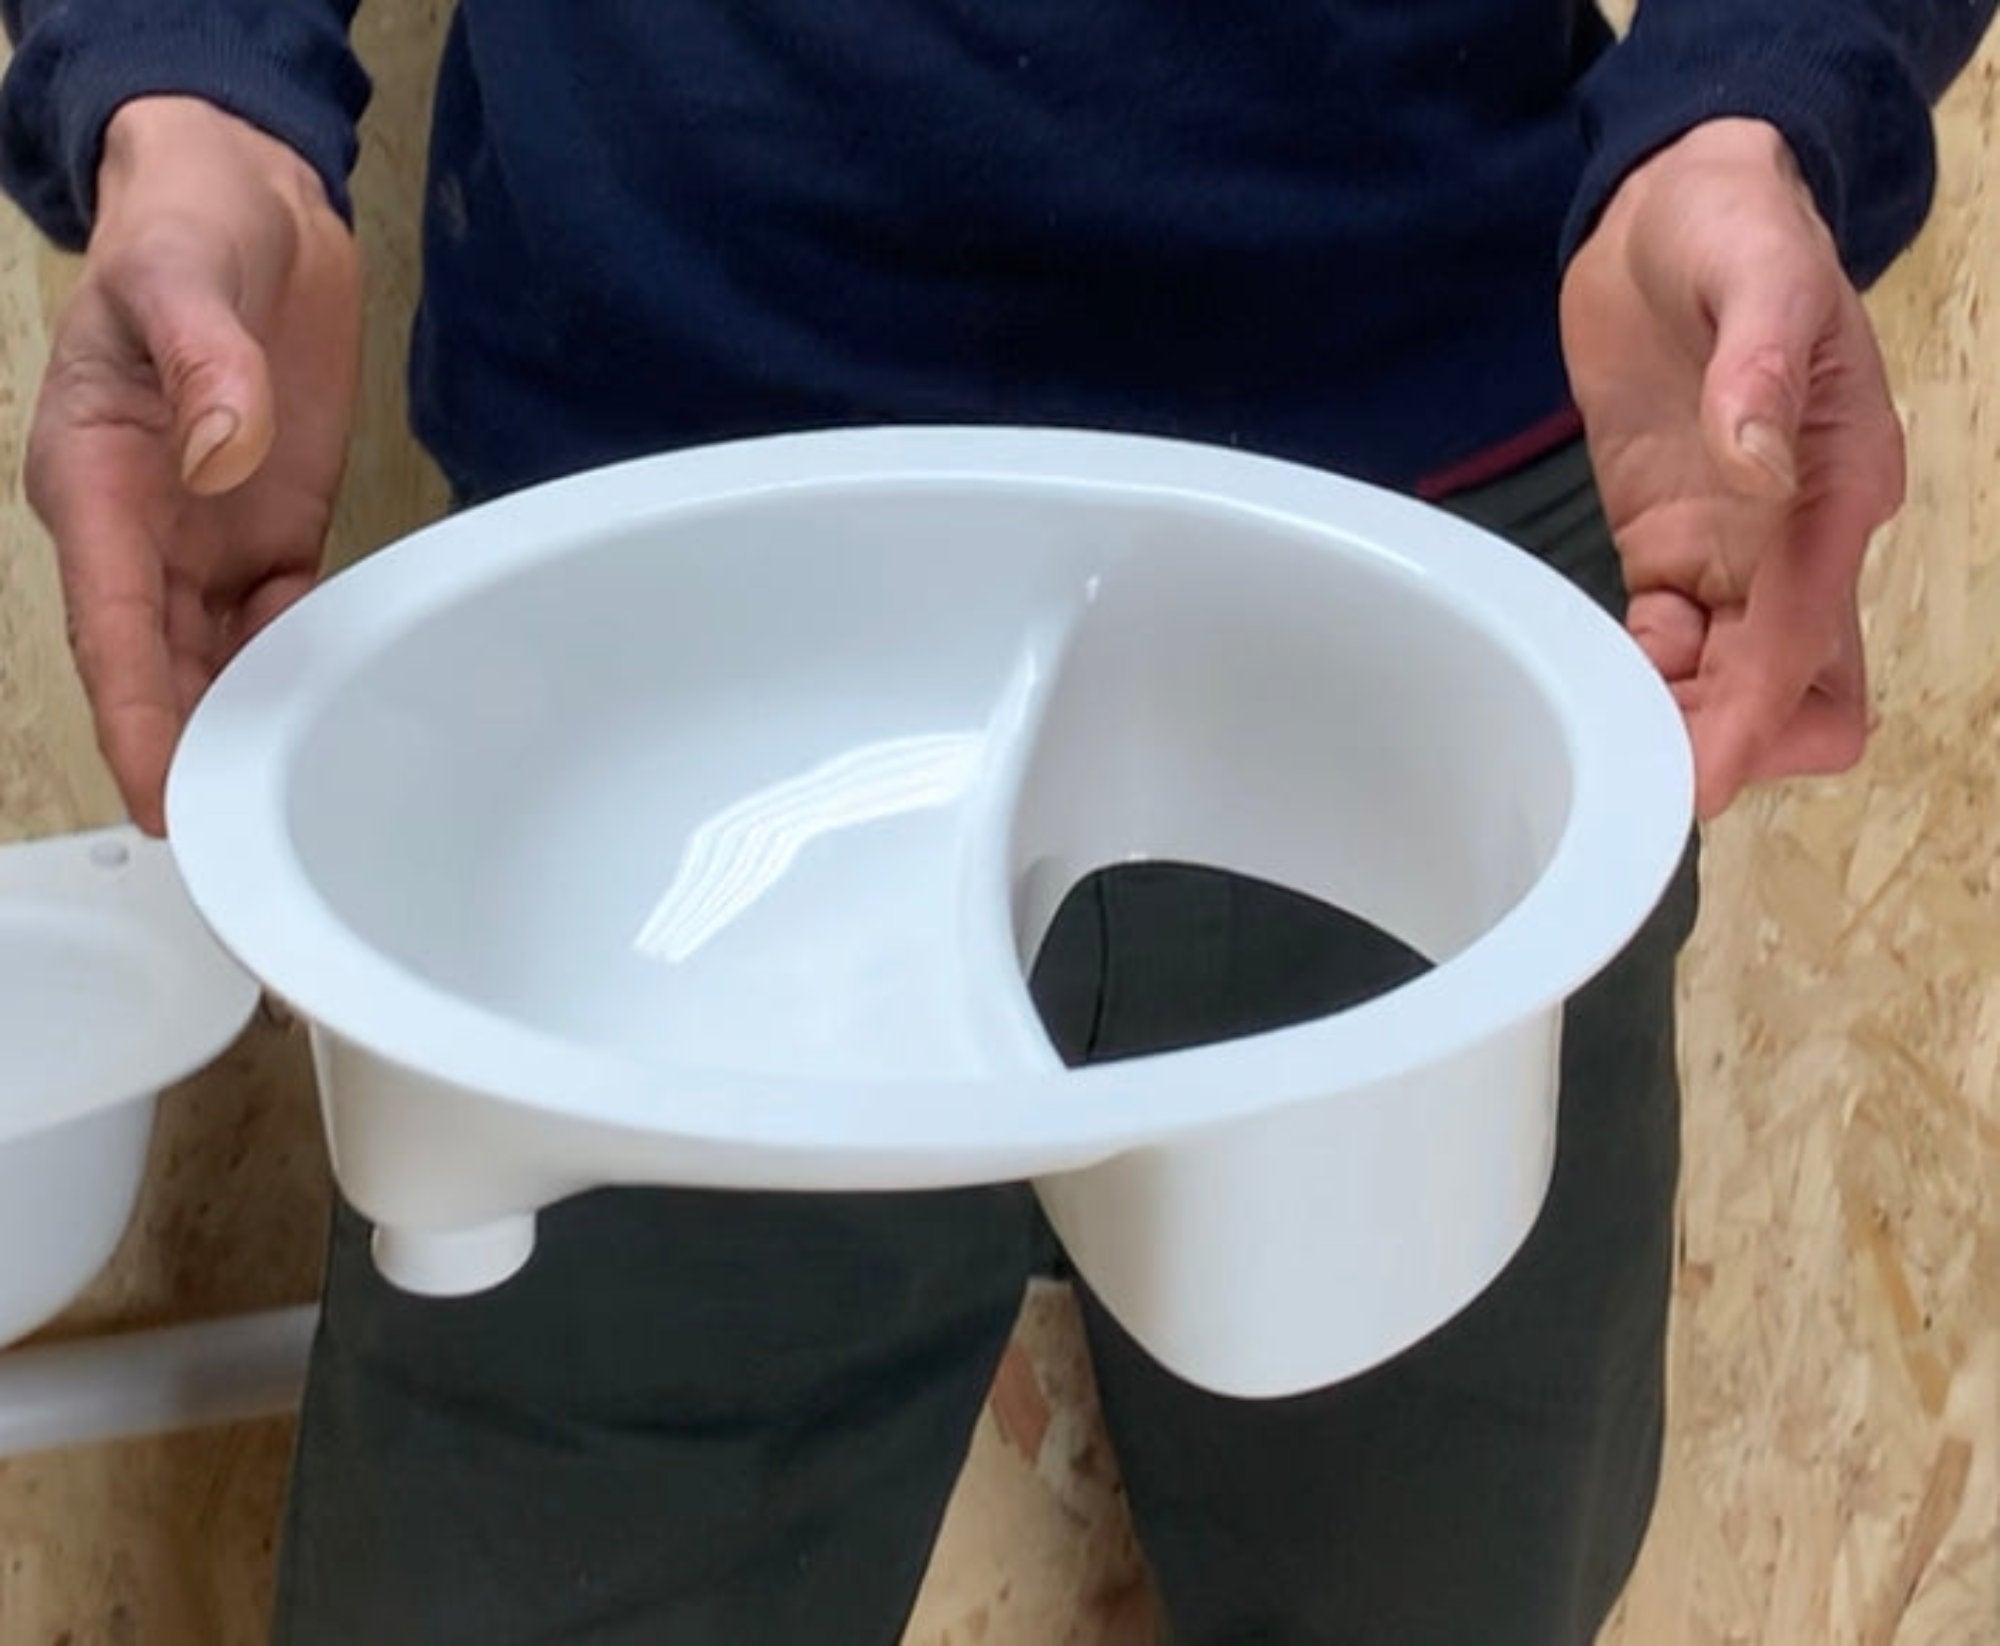
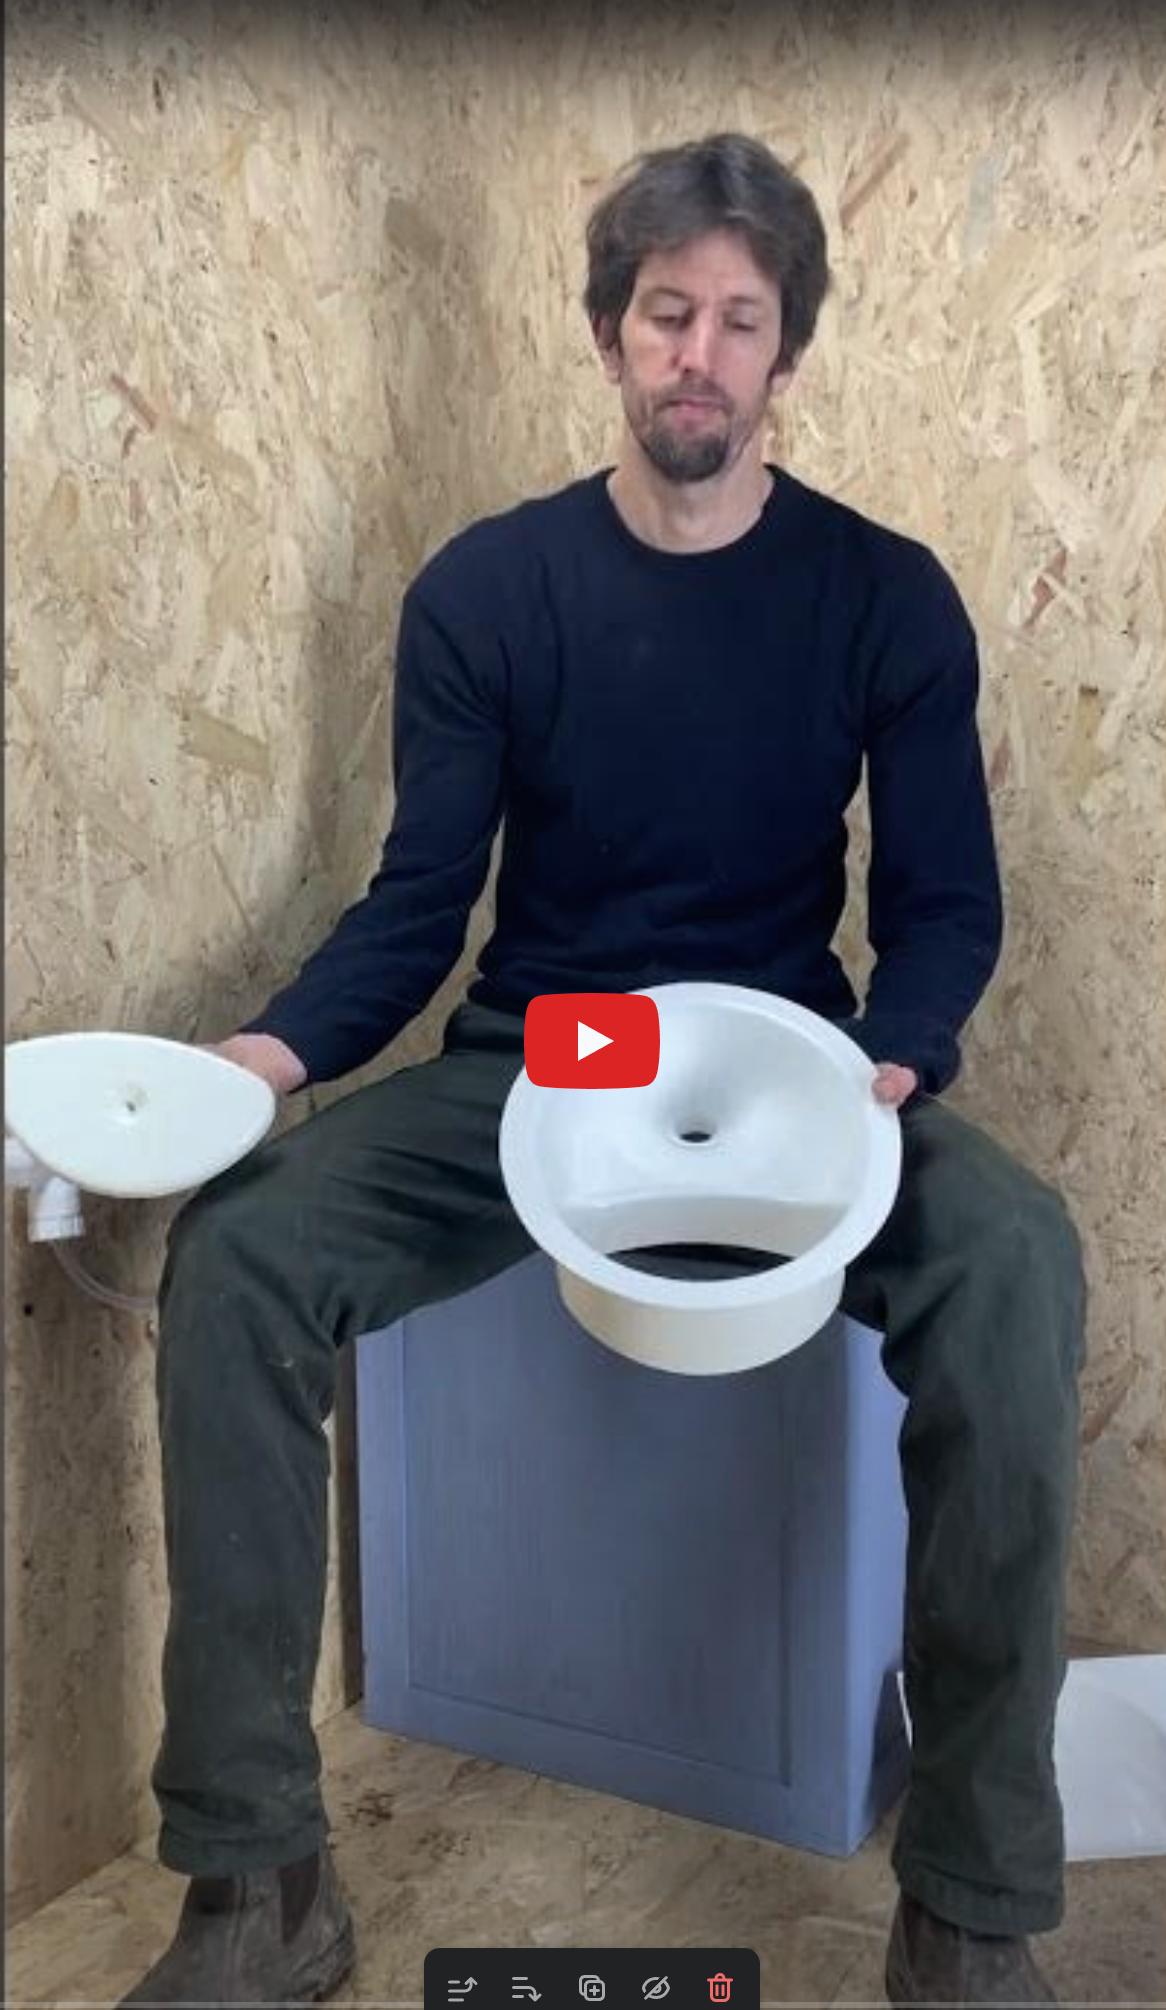
How to choose between the complete and the compact urine diverter.
Both separator are essential the same thing but the complete looks more like a traditional toilet. This does make it look more appealing but the down side are the smaller shute that the poo can go into. On most occasions this will work, but if you miss then theres more chance of spoiling the sides and having to clean this. This is also the advantage as with the compact the sideways flying poo can go everywhere. So this is really down to the receptile you choose. For the larger open recepticles I'd favour the compact, but for the smaller buckets then maybe a complete will look and function better.
Video
Our Compost Toilet Designs
There are essentially two types of compost toilet design that we favour, which are defined by the size of the poo receptacle: the one uses a 25 litre bucket, and these toilets tend to be smaller or portable; and then there are the larger wheelie bin toilets.
Bucket Toilets
Wheelie Bin Toilets
Wheelie Bin Designs
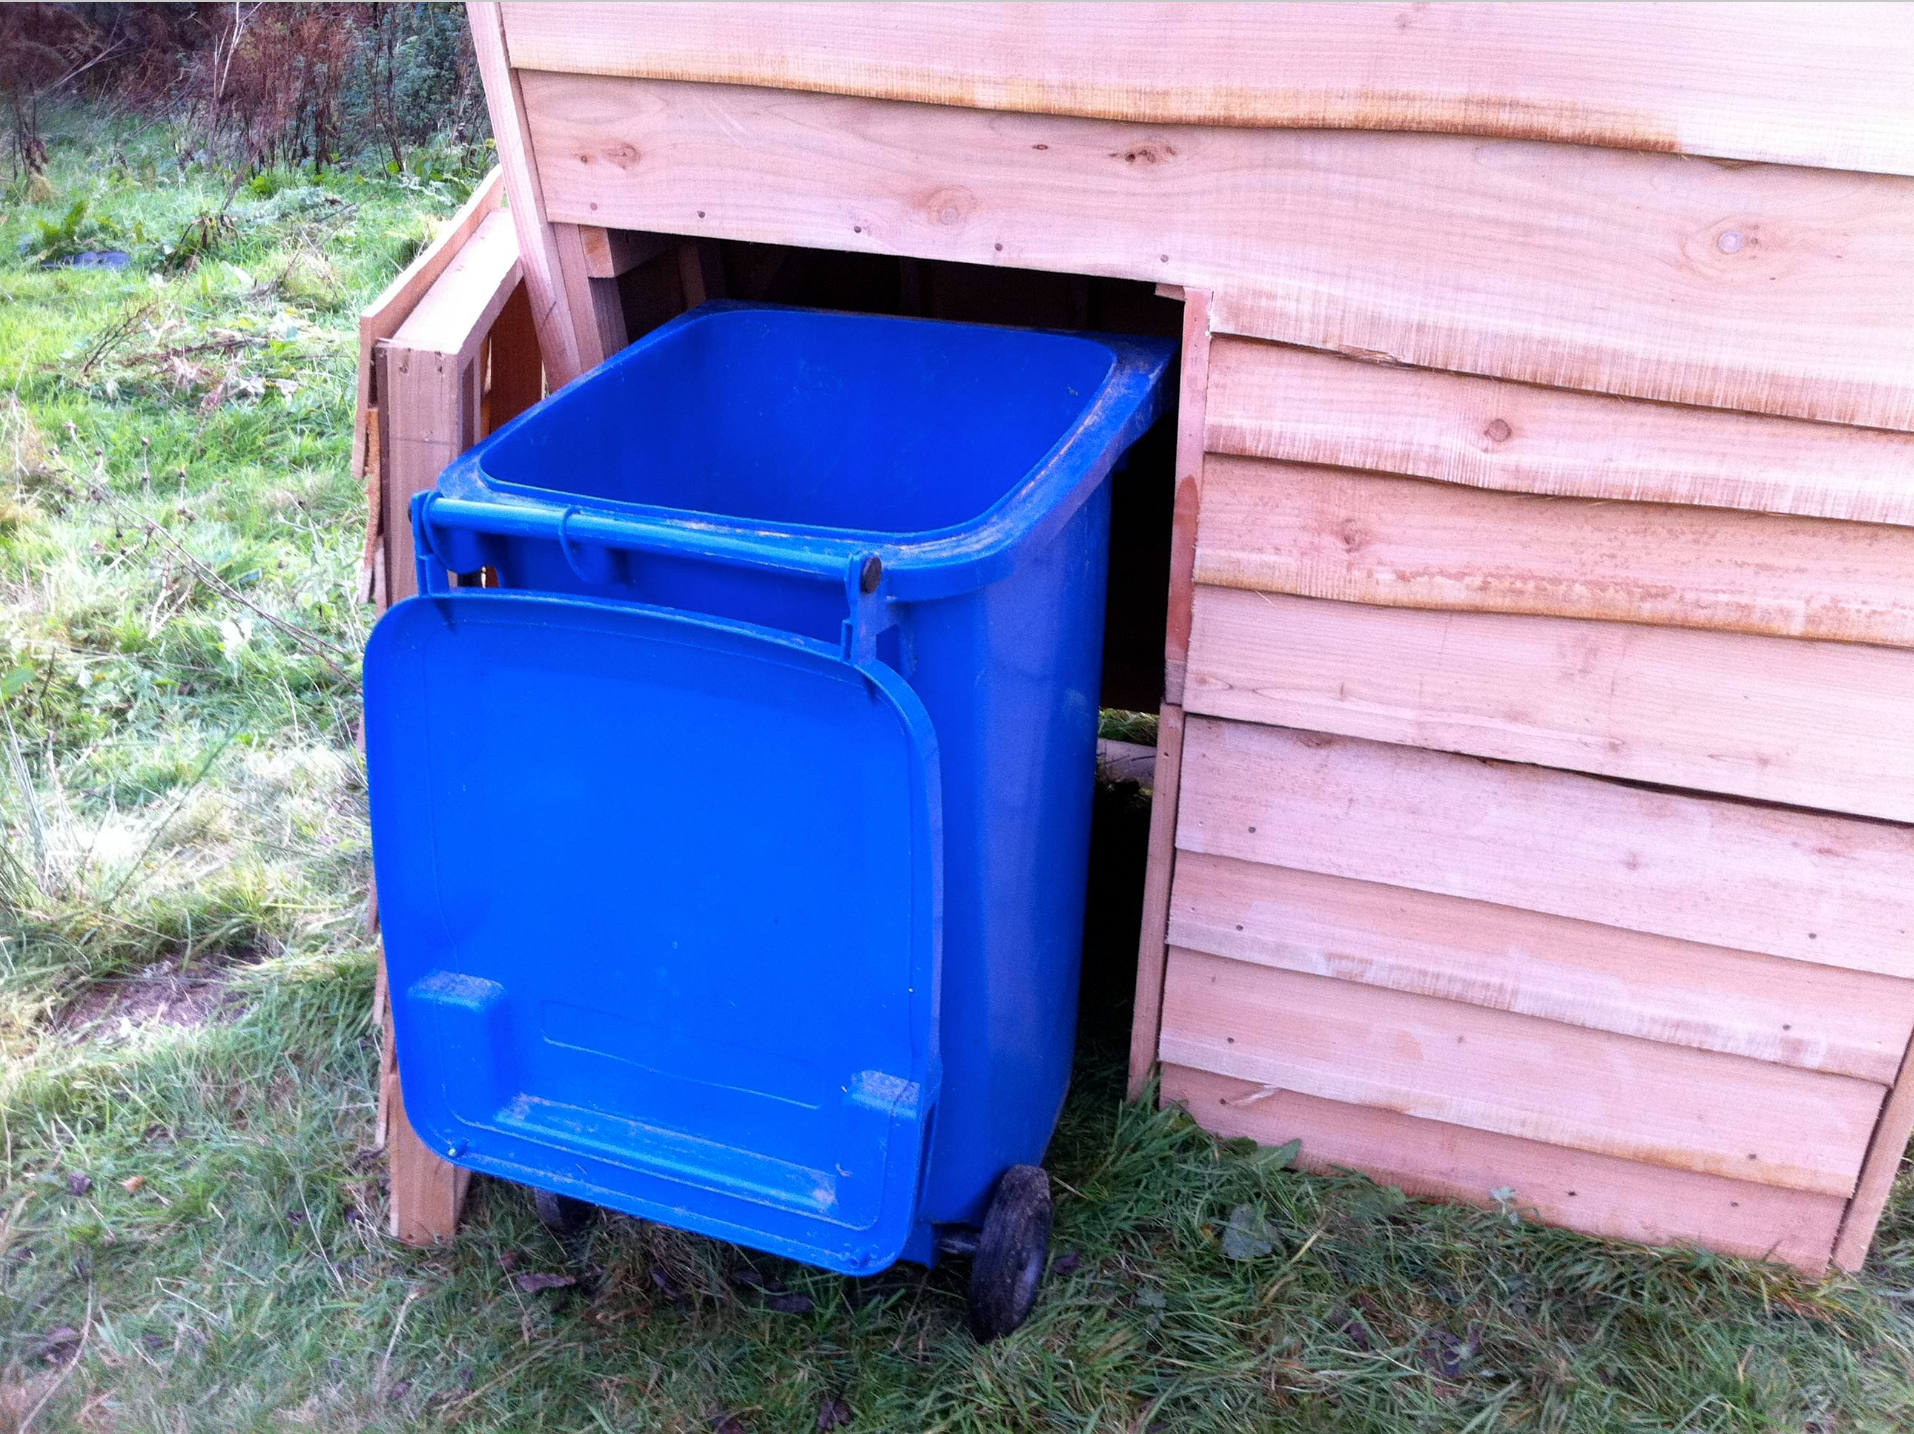
We favour using wheelie bins as the poo receptacle iin all our larger toilets. You might ask why use a wheelie bin? Well, if we were to ask a team of designers to create the perfect receptacle for a composting toilet, it's like that a wheelie bin would still win out! A wheelie bin has wheels for manoeuvrability, is rat and rodent proof, has a lid which makes it waterproof, and is inexpensive and readily available.
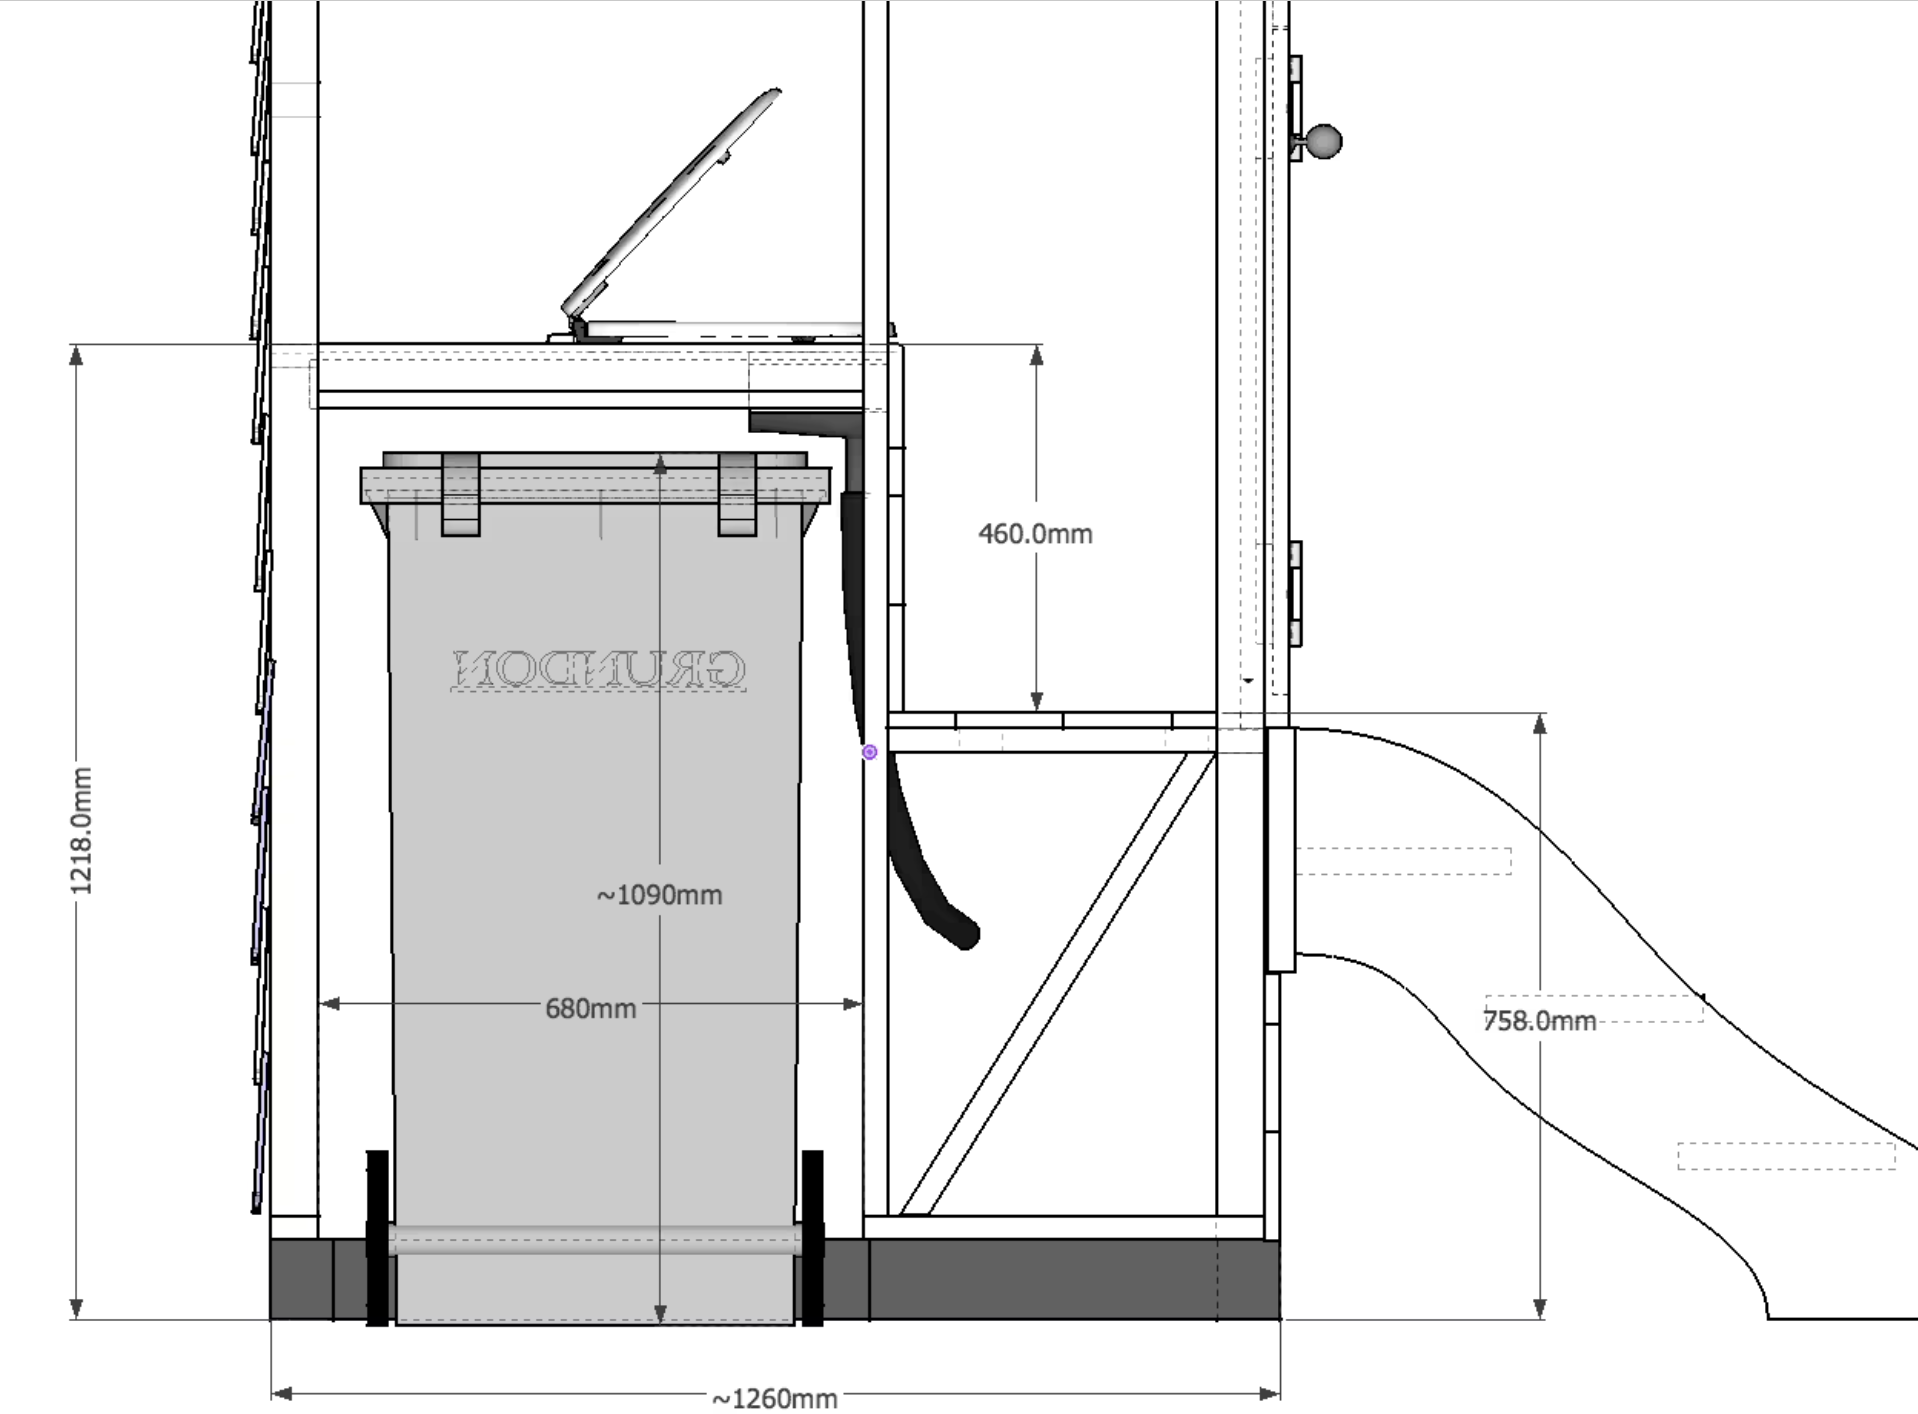
When designing a toilet using a wheelie bin start with the wheelie bin and build your toilet around this. Ok so you might think that a wheelie bin is quite tall at 1m high. Yes it is but there are ways to lower the overall height of the building. Firstly the wheelie bin can be nestled inside the toilet box that you sit on.
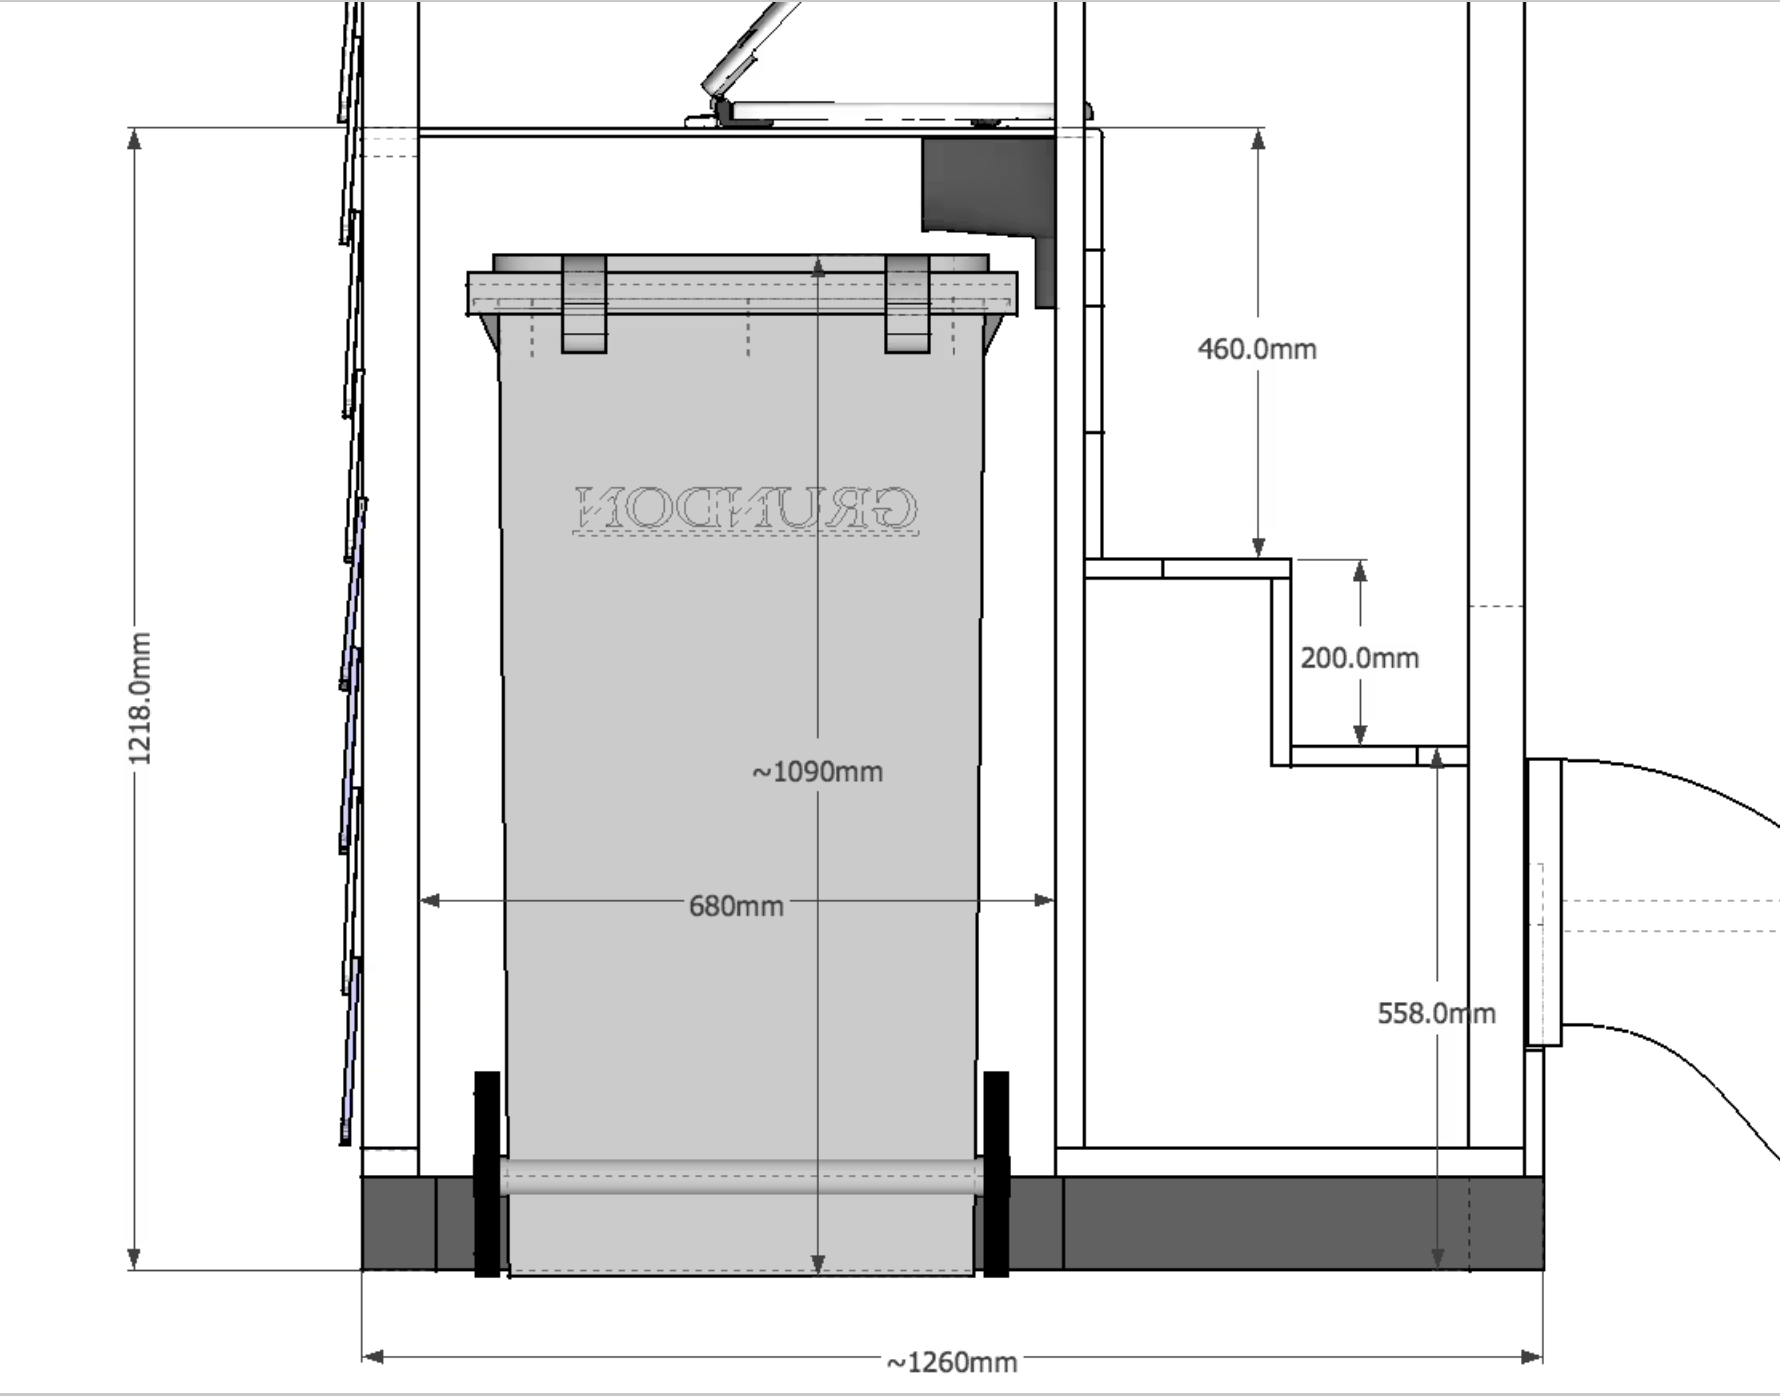
Other ways are to have a internal step inside the toilet, this does not lower the overall height of the building but does lower the ouside step height.
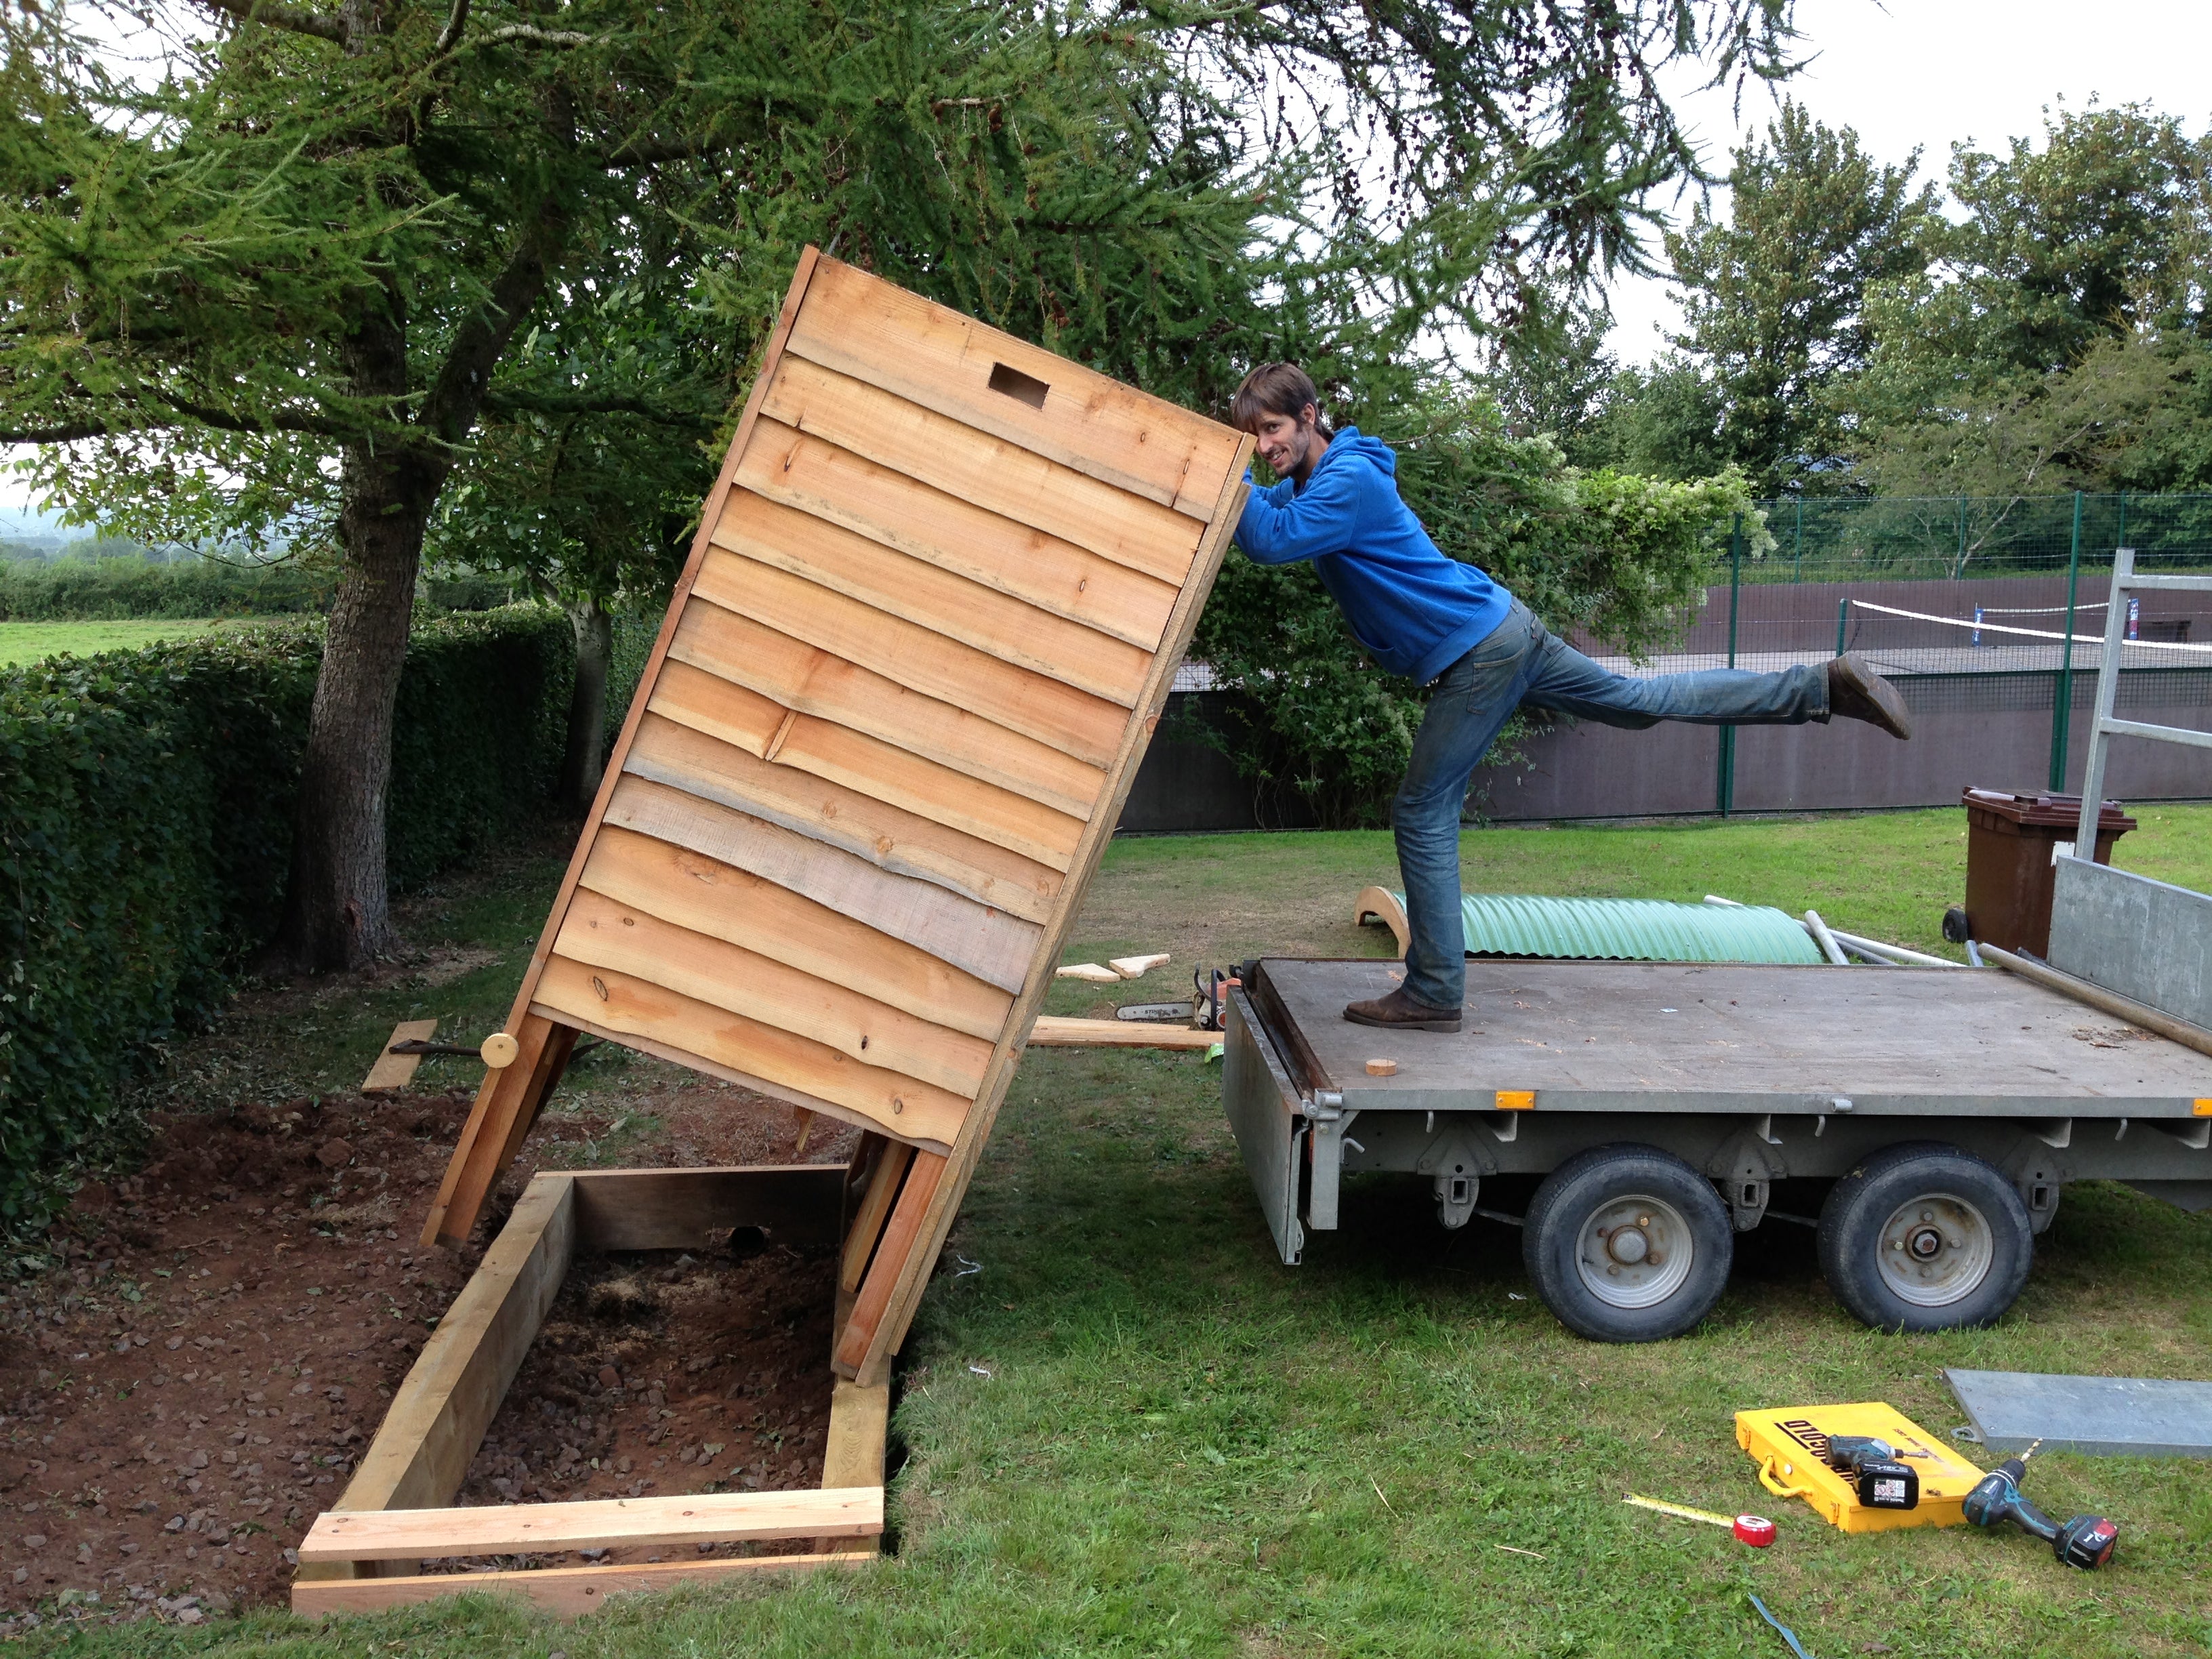
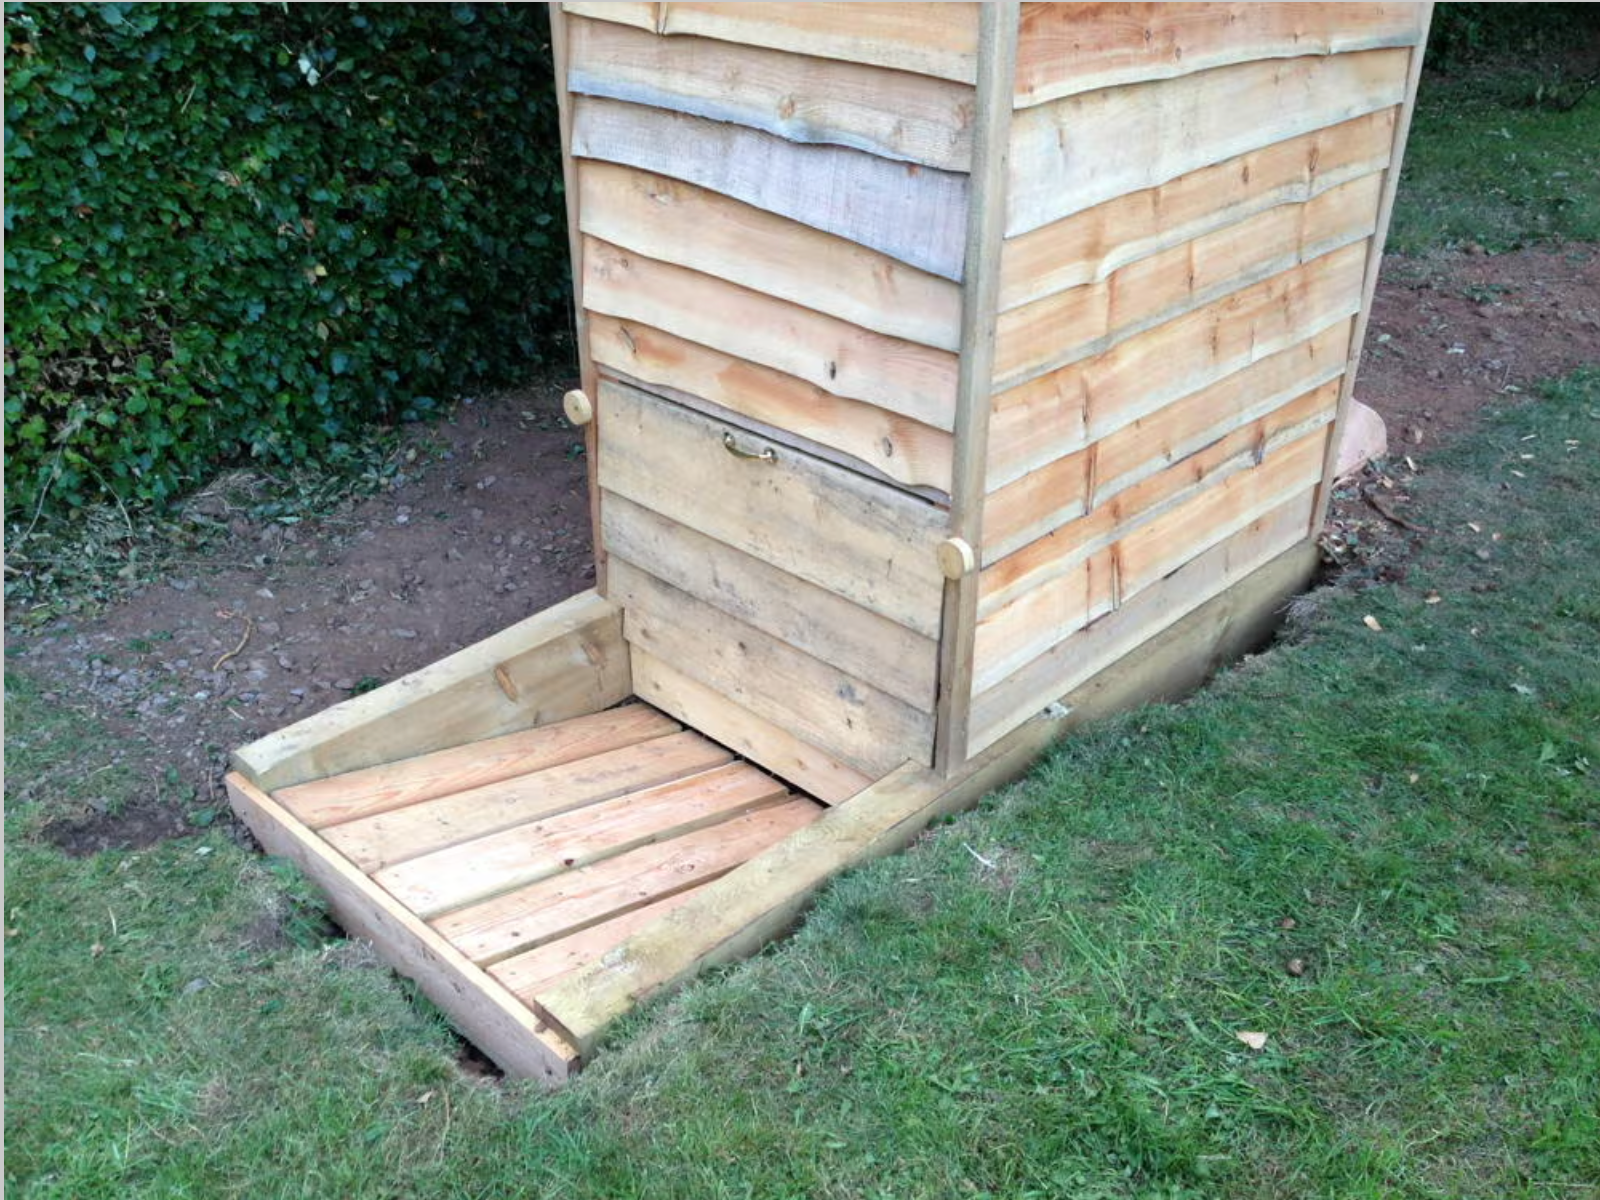
Another way is by digging down a counter ramp that is submerged into the ground.
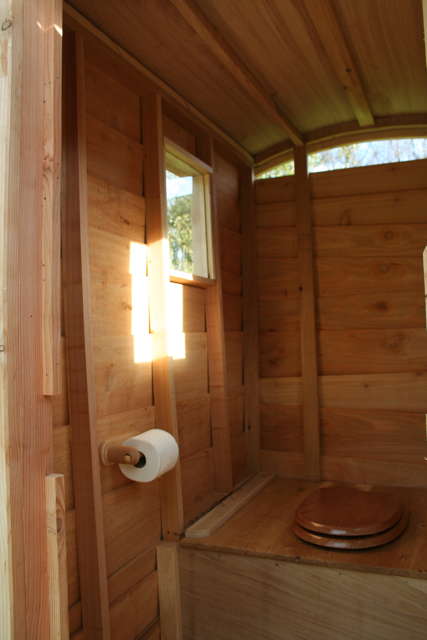
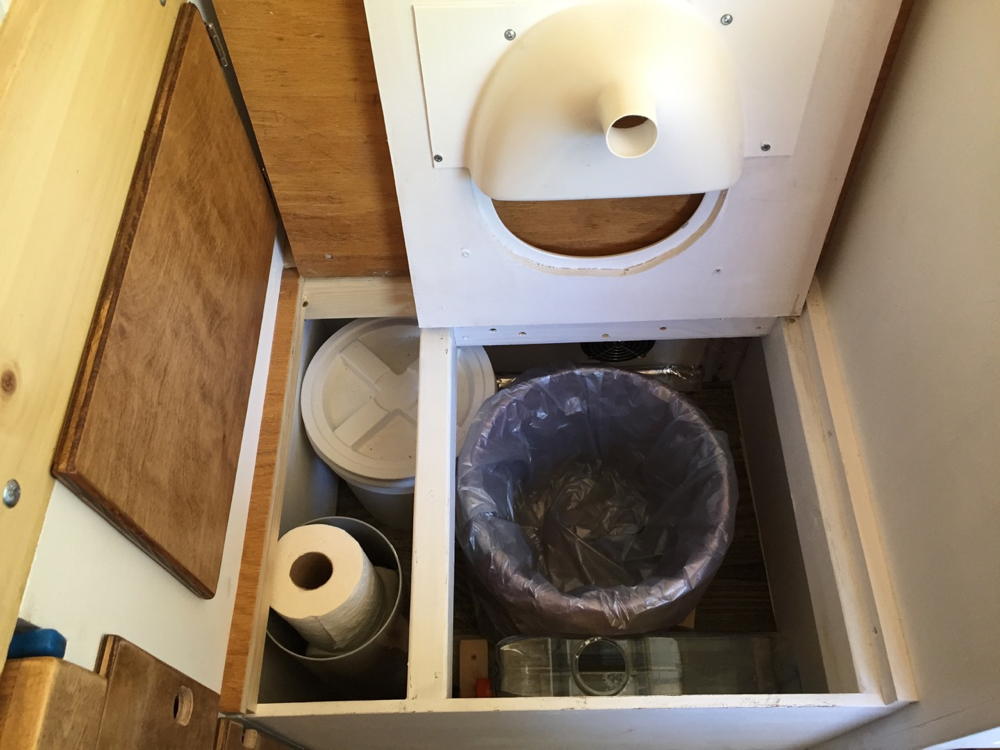
Bucket Toilet Design
Bucket compost toilets are a great solution when space is really tight, and are popular on boats and in camper-vans, cabins and pre-existing sheds.
Their main feature is the small bucket that is used for collecting the poo, which usually holds 25 litres. The urine container can be anything from an empty water bottle to a custommade water tank.
When designing a bucket toilet it is best to start with your bucket and urine collector and build the rest of your toilet around them.
This type of bucket toilet can be housed in any sort of materials from scrap wood to ply or oak.
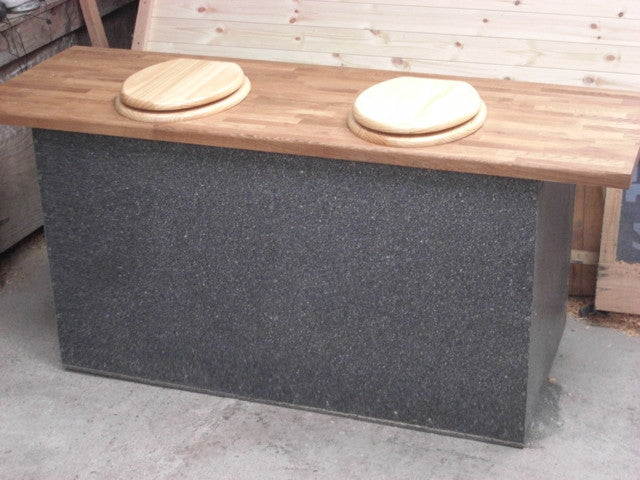
Twin Chamber Compost Toilets
This system uses a large rectangular box made from recycled plastic that is divided into two compartments: one for current use and one for resting and composting. There is a urine diverter inside that pipes the liquid into an external 25 litre container or soak away, depending on your situation.
There are two large hatches at the back of the box to empty from, and a vent pipe. Each chamber has a larger capacity than the wheelie bin, which has the advantage of needing to empty it less often, although it is not as easy to empty as the bin. However, by the time you come to empty a full chamber, the solids should have turned into odourless compost and not be unpleasant to handle.
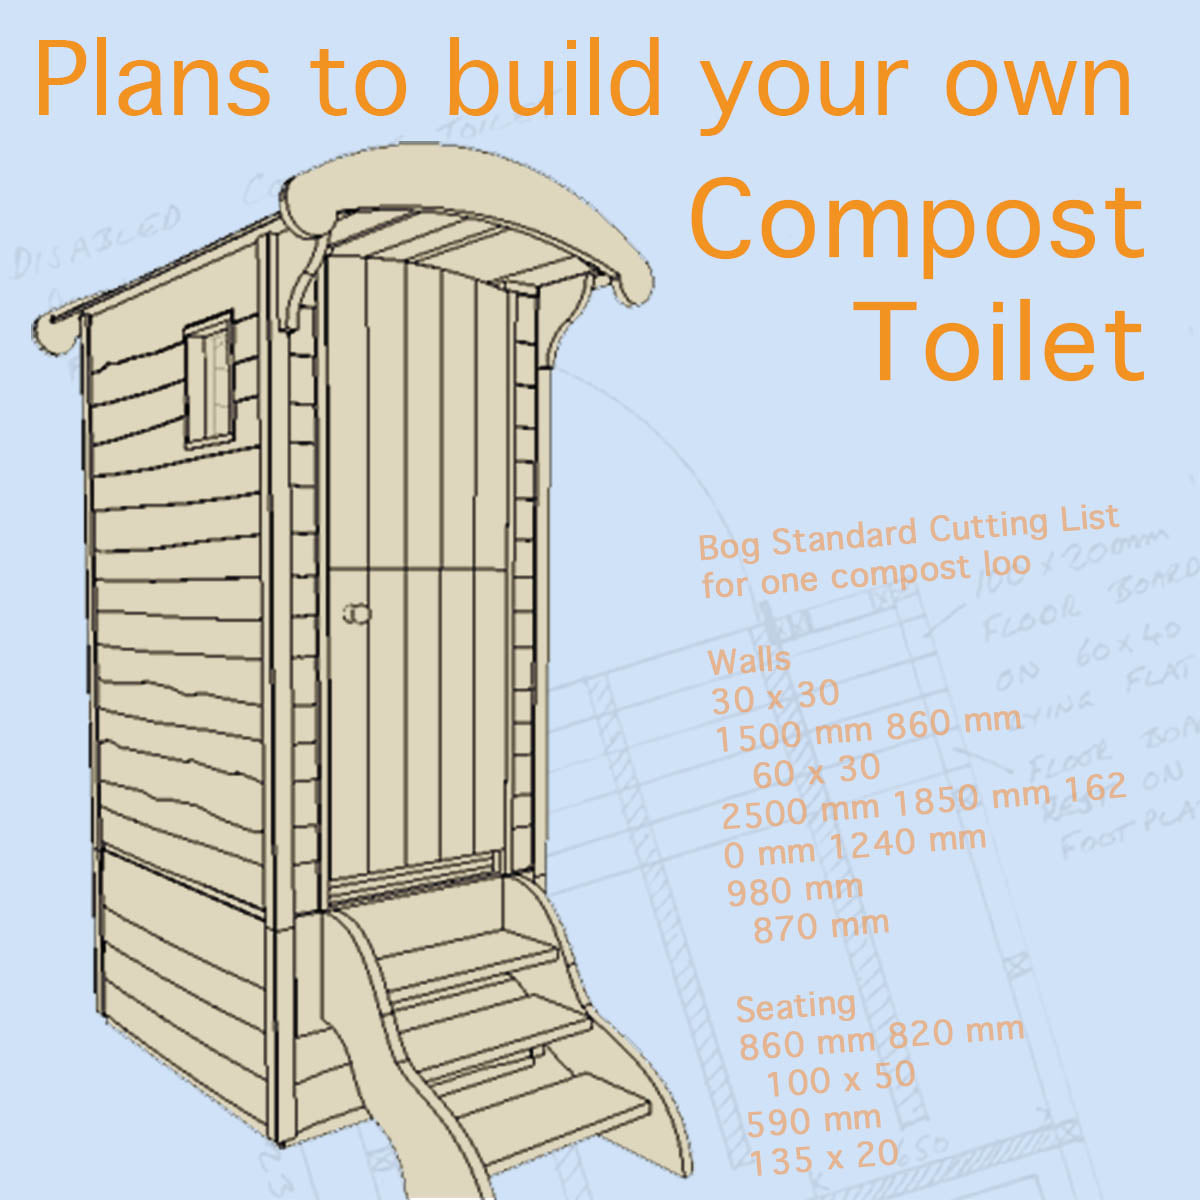
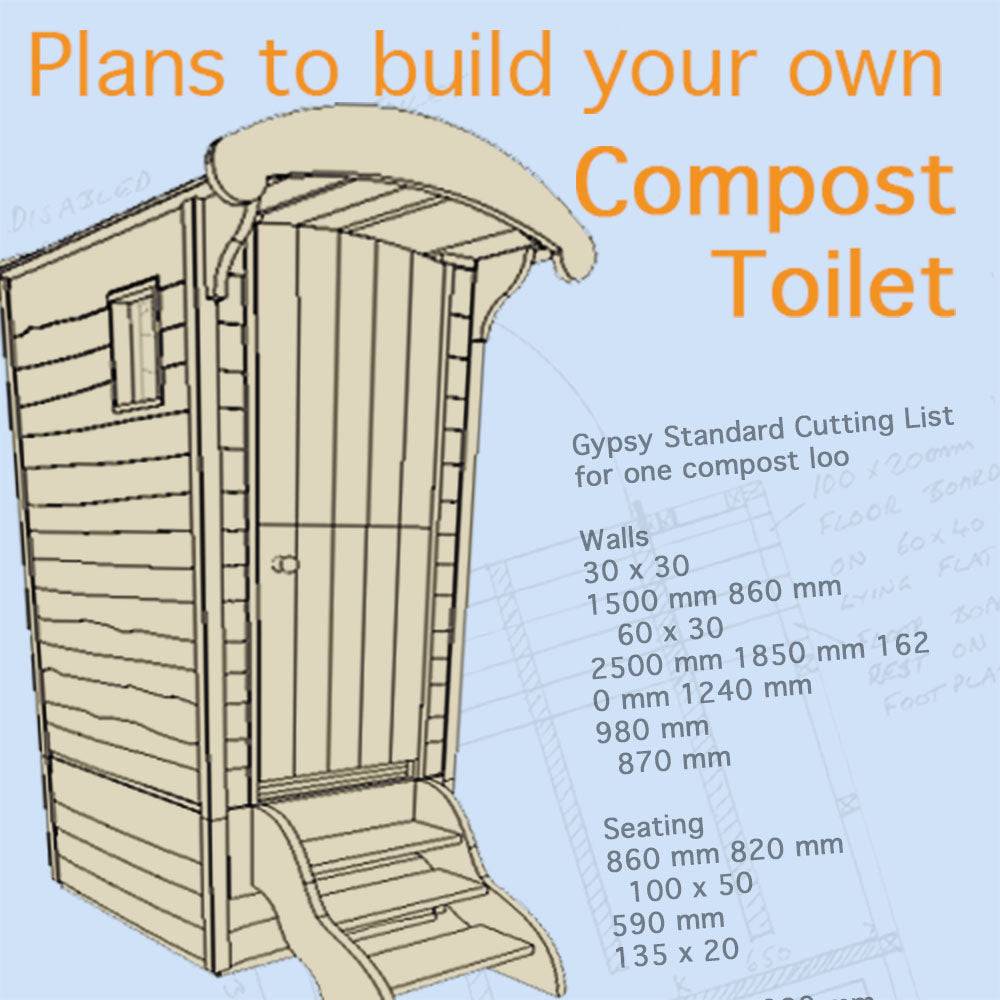
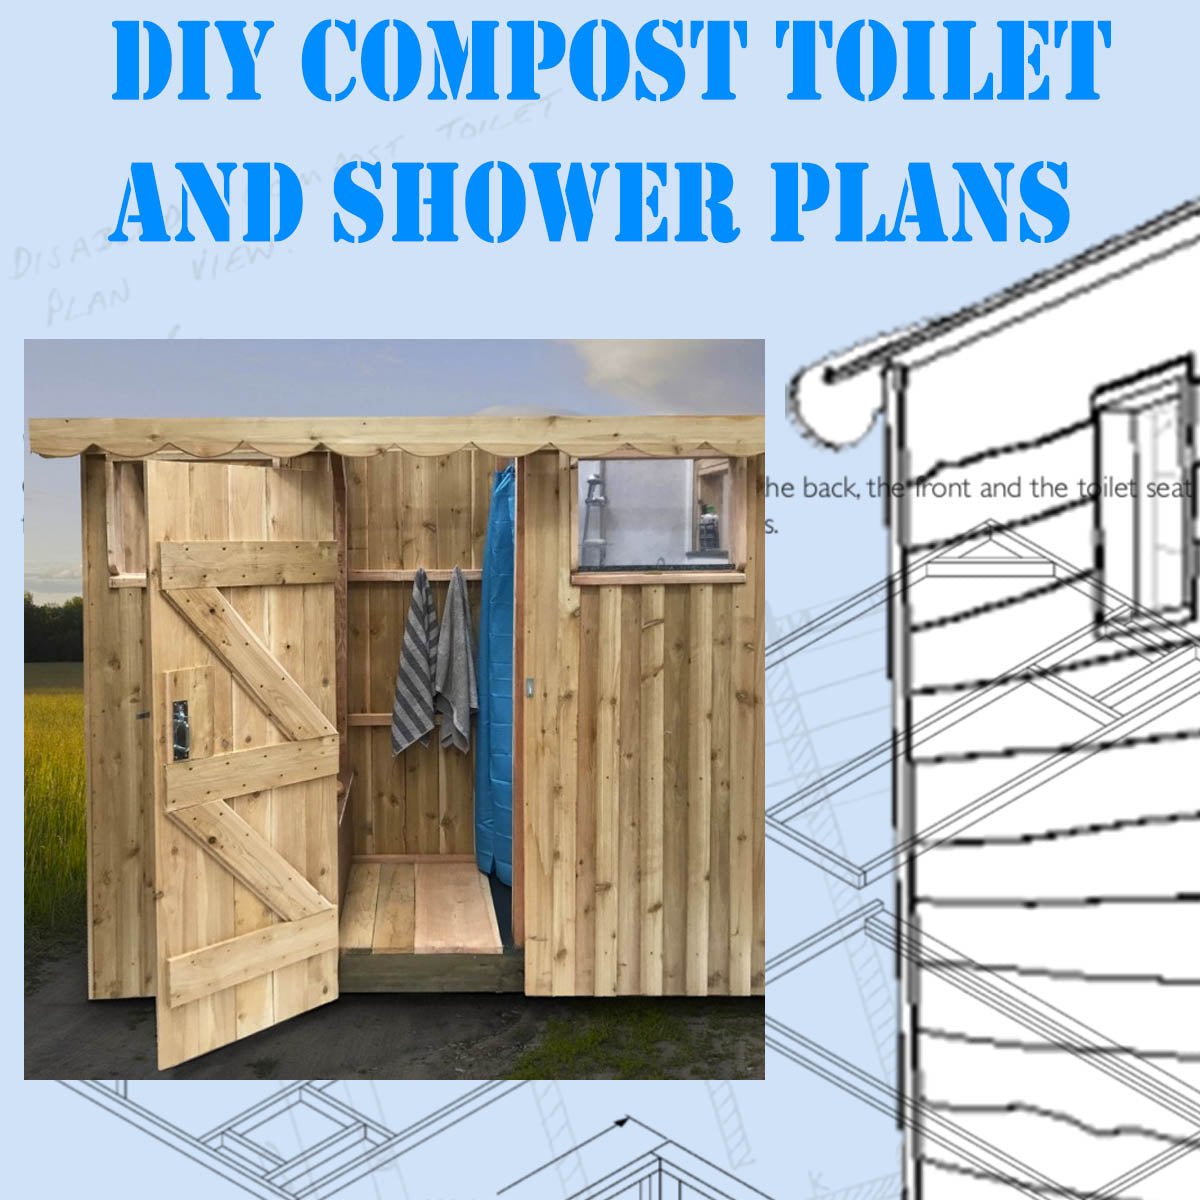
Plans to build your own DIY Compost Toilets
Over the years we have built hundreds of toilet and can now offer you our plans for you to build your own compost toilet using our experience. All plasn come in a pdf format and have everything you need to get going straight away.
Featured collection